Chicken Piccata

If you’re looking for a chicken recipe that is healthy, delicious, and different, look no further – chicken piccata fits all three of those demands.

chickenpiccatablog-014

There are several steps to this recipe, but it is SO GOOD and only uses one skillet, so there’s not much to clean up afterward. Here’s what you’ll need:

chickenpiccatablog-001

  • 4 chicken cutlets (thin sliced chicken breasts)
  • 2 tbs olive oil
  • 1/4 cup white wine
  • 3 cloves garlic, minced
  • 2 lemons (1 for juice, 1 thinly sliced)
  • salt and pepper
  • flour (for dusting)
  • 1/2 cup chicken stock
  • 1 tbs capers
  • 2 tbs butter
  • 1 tsp dried parsley flakes

chickenpiccatablog-003

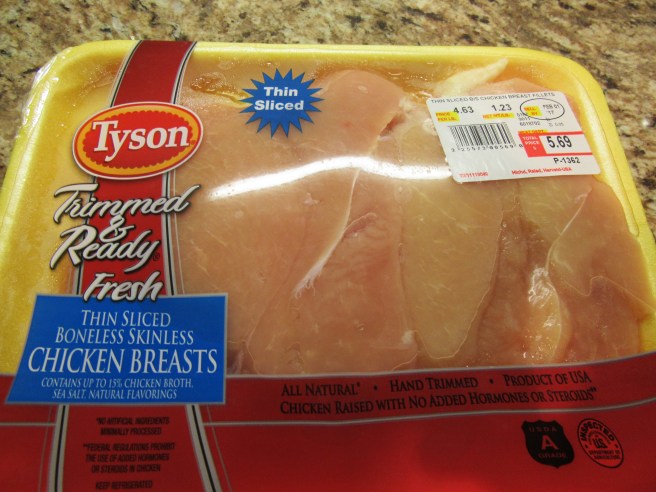
My grocery store sells these boneless-skinless chicken breasts already “thin sliced,” but if you can’t find any, just take regular chicken breasts and pound them flat with a rolling pin. You can put them in a ziploc bag before pounding to keep your rolling pin from touching the meat. You want them thin so they will cook faster and more evenly in the skillet.

You can find capers on the pickle aisle at the grocery store. What are capers? I’m not really sure! They come in a brine, and taste like a cross between a pickle and an olive. They are tiny, and give this chicken dish a distinctive flavor.

Ok, now let’s get started! First, heat the olive oil in a large skillet on medium-high heat. While the oil is heating, sprinkle the chicken pieces with salt and pepper, and “dust” them with flour.

chickenpiccatablog-004

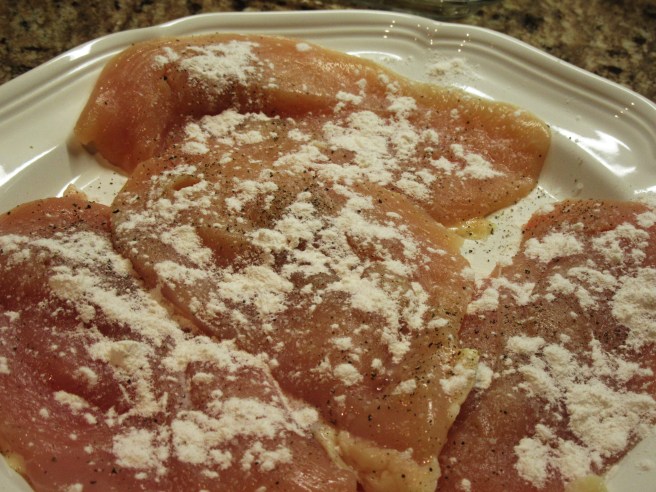
You don’t want too much flour because you don’t want to give the chicken a fried “skin.” I just used one spoonful for all four chicken pieces.

Once the oil is hot, saute the chicken about 2-3 minutes per side, until it is cooked through. It only takes a few minutes to cook them since they are so thin.

chickenpiccatablog-006

Once they are finished cooking, remove them from the skillet onto a plate and set aside for later. Next, “deglaze” the skillet with the white wine – all this means is pour the wine in and scrape/stir all the pan drippings while it cooks. Add in the minced garlic and cook until the liquid is almost gone.

Now add the chicken stock, capers, and the juice of one lemon to the skillet and bring back to a boil. Return the chicken to the pan and cook a couple of minutes on each side in this liquid, then put them back on the plate. (I told you there were a lot of steps! We are almost done though!)

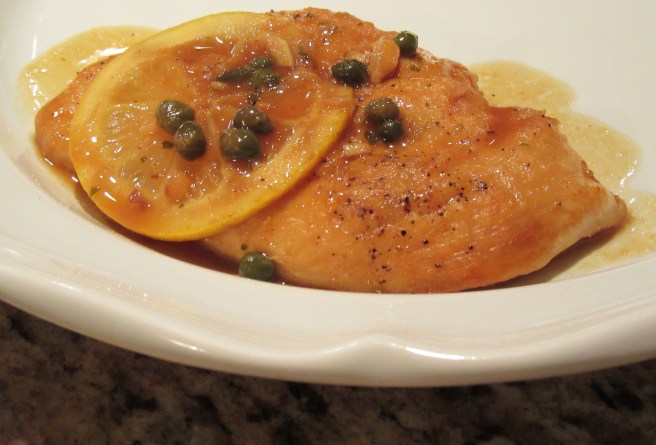
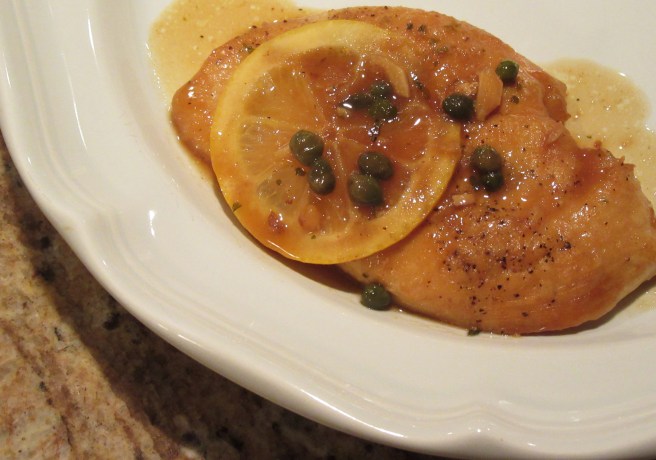
Now finish the sauce with the butter, lemon slices and parsley. Once the butter is melted, return the chicken to the pan for the last time, and spoon the sauce over the meat.

chickenpiccatablog-011

If you look closely, you can see the garlic pieces in the sauce with the capers and lemon.

This dish is also very pretty! I love all the colors and textures in the pan!

chickenpiccatablog-014

The chicken will be very juicy from cooking in the sauce, and the bitterness of the lemon and capers combined with the savory chicken stock and garlic give it a distinctively delicious flavor.

chickenpiccatablog-013

This only takes about 30 minutes to make from start to finish, so it’s perfect for weeknight dinners. Your family will think you were in the kitchen for hours making this beautiful dish!

I made a salad and some fettuccine from a box to go with ours for an easy way to complete the meal. I hope your family enjoys this dish as much as mine does!

Thanks y’all!

   – Nikki

Zucchini Boats

zucchini-boats-005

These zucchini “boats” have been popping up on my Pinterest feed for a few months now, and I’ve been nervous to try them. I mean, why in the world would you put something on a zucchini when you could put it in a delicious tortilla?!? Well, I’m trying to eat better for the new year, so I thought I would at least give these a try, and I’m so glad I did! I may never eat another tortilla again! Not only are these healthy, but they taste AMAZING! I was very surprised at all the flavor!

To start with, slice a couple of zucchinis in half lengthwise and hollow out the middle with a spoon to form a “boat.” (I also peeled mine because I don’t like the skin’s texture, but you can leave the peel on.) Next, just drizzle a little olive oil on top, sprinkle with salt and pepper, and bake at 400 degrees for about 20 minutes.

The first picture is before they went in the oven, and the second is when they were done cooking. Roasting the zucchini not only makes it tender, but gives it both a sweet and savory flavor that is delicious with whatever you choose to fill it with. I used taco meat for mine, topped with cheese, lettuce, onion and fat-free sour cream.

My family members are not as adventurous as I am when it comes to trying new foods, especially healthy ones, which makes this the perfect meal. Instead of cooking an entire other meal for the boring ones in the house, I just put the same filling in tortillas for them. Now everyone is happy!

zucchini-boats-003

I’ve also seen these filled with fajita chicken, buffalo chicken, Italian sausage, other vegetables…  Pretty much anything would go well with the roasted zucchini’s flavor.

zucchini-boats-008

I cannot say enough times how GOOD these were! The sweet flavor of the zucchini was so surprisingly delicious! I did not miss the tortilla AT ALL, and I sure didn’t miss the carbs that come along with tortillas!

I hope you’ll give these a try! I promise you’ll be glad you did!

Thanks y’all!

– Nikki

A Healthier Quesadilla

quesadillas-013

When it comes to eating healthy, I have one major weakness – Mexican food. Chips and salsa, queso, chimichangas, but especially quesadillas!

These “healthy” quesadillas still give me my Mexican food fix, but without the remorse. Here’s what you’ll need:

quesadillas-005

  1. 1 pack of Carb Balance whole wheat tortillas (8 count)
  2. 1 block Monterey Jack cheese, grated
  3. 1 sweet potato, boiled and mashed
  4. 1 can black beans, drained and rinsed

These “carb balance” tortillas are fairly new, and they taste more like a flour tortilla than the regular wheat tortillas do, and they are even healthier than a regular wheat tortilla. The texture is also more similar to a flour tortilla.

Start by spreading some of the mashed sweet potato onto a tortilla, then top it with a generous amount of beans and cheese.

quesadillas-006

Place another tortilla on top, and cook in a quesadilla maker until the cheese is melted.

*If you don’t have a quesadilla maker, you can cook them in a skillet, pressing down with a spatula and flipping over halfway through. I think a quesadilla maker is totally worth the investment though – they are only about $20, and I use mine all the time.*

That’s it! Only four ingredients, and just a few minutes to prepare. The beans give them a “meaty” taste and are full of protein and fiber, and the sweet potato makes you feel full faster so you don’t eat as many.

You can also add any other veggies to these you’d like – purple onion tastes great in them, and bell pepper does as well. If you have to have meat, grilled chicken is great in them too.

quesadillas-012

You can also dip them in fat free sour cream or guacamole for some added flavor.

quesadillas-015

What an easy (and tasty) way to start a healthier new year!

Thanks y’all!

   – Nikki

Snickerdoodles

snickerdoodles-017

When I was in junior high I took a home economics class. I don’t remember who all was in the class with me. I don’t even remember my teacher’s name. But I do remember these babies – snickerdoodles. We made them in class and I remember thinking they couldn’t possibly be any good with such a silly name. I was wrong. These may be the best cookies I’ve ever tasted.

snickerdoodles-019

Here’s what you’ll need:

  • 1 stick butter, softened
  • 1/2 cup sugar
  • 1/3 cup brown sugar
  • 1 egg
  • 1/2 tsp vanilla
  •  1-1/2 cups flour
  • 1/4 tsp salt
  • 1/2 tsp baking soda
  • 1/4 tsp cream of tartar

… and for rolling:

  • 2 tbs sugar
  • 1 tsp cinnamon

snickerdoodles-001

Start by creaming together the softened butter with the sugar and brown sugar in a mixer on high speed.

Add egg and vanilla, and continue mixing until smooth.

snickerdoodles-003

Combine remaining dry ingredients in a separate bowl, then slowly add to mixer until dough is well blended.

snickerdoodles-004

The dough will be very sticky, too sticky to work with, so put it in the refrigerator for at least 30 minutes (an hour is even better).

After the dough has set up, preheat your oven to 300 degrees and combine the cinnamon and sugar in a small bowl for rolling.

snickerdoodles-006

Roll dough into small balls, about 2 tbs each, and then roll on all sides in cinnamon/sugar mixture. Slightly press each ball onto greased cookie sheets.

snickerdoodles-009

Bake at 300 degrees about 12-14 minutes. The cookies will look raw – don’t get nervous! They are supposed to appear undercooked.

snickerdoodles-011

They will continue to develop after they come out of oven, and will flatten out as they cool.

The end result are these soft, chewy, delicious cookies…

snickerdoodles-018

These cookies involve a lot of ingredients and many steps, but they are so worth it! My husband would eat this whole tray of snickerdoodles if I let him!

snickerdoodles-020

Thanks y’all!

   – Nikki

6 Ways to Update Your Home (…without breaking the bank!)

It’s a brand new year, and what better way to start fresh than to update your living area in your home? Oh, that’s right… we are all flat broke from Christmas! Trust me, I understand, so here is how I updated my living room and kitchen for less than $75…

blueblog-005

It’s a sad day in the Camp household when the Christmas decorations come down, so to cheer myself up I decided to give my house a small makeover. My favorite color has always been blue, so that is the color I went with. It is amazing how simply changing out my accent color made this house feel brand new.

1. Accent rugs

blueblog-003

Large area rugs are super expensive, so I have a neutral color in my living room so I won’t get tired of it. But these little guys are cheap, so it’s easy to change them out every so often. This navy blue and white rug was only $12, and it’s the first thing I see when I come in the back door.

2. Blankets

blueblog-007

Another cheap item to change out is a throw blanket. This navy blue one gives some color to this corner of the living room, which consisted of only neutral browns and creams before. Throwing blankets over chairs or couches, or just stacking them in a basket on the floor is a great way to add some color to your room.

3. Accent pillows

blueblog-022

By changing out my old turquoise pillows to these navy blue and cream ones, it made this feel like a brand new living room. I didn’t have to paint the walls or buy new furniture, I just swapped a couple of pillows out. These were sold in a pack of two for only $20 at Bed Bath & Beyond, and that $20 gave this room a whole new feel.

4. “Knick-knacks”

Adding a few “knick-knacks” on your shelves and tables is another cheap and easy way to bring in your new accent color. I already had some blue items in other rooms that I moved into the living room and kitchen, and I found a few more new things that only cost a few bucks. It’s the little stuff like this that ties everything together.

5. Dish Towels

Our kitchen is open to our living room, so having the same accent color in both rooms is necessary to make everything “flow.” A few dish towels with navy blue on them does the trick for just a few bucks!

6. Declutter

blueblog-018

Keeping small stuff in baskets or trays is a good way to keep your house decluttered and look more “put together.” It’s also much easier to clean up when a ton of little stuff isn’t sitting around everywhere.

I hope this post has given you some ideas and inspiration for your own home! If you stick to neutral colors on the big stuff like walls and furniture, then it’s easy to switch up your accent color anytime you want, making your house feel brand new. And what better time to make a fresh start than the new year?!? Happy decorating!

blueblog-005

Thanks y’all!

   – Nikki