Smothered Skillet Pork Chops

Looking for something fancy to cook for supper tonight? These smothered pork chops are not only delicious, but your family will think you were in the kitchen for hours cooking them! They actually only take about 30 minutes, and with all the colors in the sauce from the vegetables, they look as good as they taste!

Here’s what you’ll need:

  • 4 bone-in pork chops, 1-inch thick
  • 1 yellow onion, chopped
  • 1 red bell pepper, chopped
  • 3 stalks celery, chopped
  • 3 garlic cloves, minced
  • 4 green onions, chopped
  • fresh thyme (I used about 5 sprigs)
  • 3 tbs flour
  • 2 tbs butter
  • 2 tbs olive oil
  • 2 cups chicken stock
  • 1/4 cup heavy cream
  • 1 tsp hot sauce
  • salt and pepper
  • large skillet with a lid

Season the pork chops with salt and pepper, then brown in olive oil in large skillet about 3 minutes per side, then remove them to a plate. They will finish cooking later in the sauce.

While the pork chops are browning, you can chop up the vegetables.

In the same skillet the meat was in, melt the butter, then add in the onion, bell pepper, celery and garlic. Add a little more salt and pepper and cook vegetables a few minutes until they are tender.

Now stir in the flour and let it cook about a minute, then stir in the chicken stock. While that is coming to a simmer, add in the fresh thyme.

You can either put the whole sprigs of thyme in, and let the leafy parts cook off and remove the actual stem later, or you can just run your fingers down the stem and the little leaves will come right off – there’s no need to chop it. It will have a lemon-like smell to it.

It’s already colorful and smelling yummy! Once the sauce is simmering and starting to thicken up, add the pork chops back in, reduce heat to low, and put the lid on. Cook meat about 10 minutes in sauce, then flip them over and cook another 10 minutes.

Now take the pork chops out one more time, and stir in the hot sauce, heavy cream and chopped green onions to finish the sauce. Add meat back to skillet and you’re done!

You can serve them over rice, mashed potatoes, grits… the sauce would be so good over pretty much anything. I served mine over angel hair pasta.

So pretty, so delicious, and so easy! (Even though your family will think it took you hours!) And only one skillet to clean up! I hope y’all enjoy these pork chops as much as we did!

Thanks y’all!

– Nikki

Hawaiian Crescent Roll-Ups

fullsizeoutput_8b7

Looking for an easy meal that your whole family will love? It doesn’t get any easier than these Hawaiian crescent roll-ups! I made these as a quick dinner after baseball practice one evening, but they are also perfect for breakfast, lunch, a snack, or an appetizer. And if these kids ever go back to school, leftover roll-ups are perfect to throw in a ziplock bag and pack in their lunch box!

Here’s what you’ll need:

  • 2 cans refrigerated Sweet Hawaiian crescent rolls
  • 1 large pack deli sliced ham
  • 8 slices cheddar cheese
  • melted butter, for brushing on top

fullsizeoutput_8b6

If you can’t find the Sweet Hawaiian crescent rolls in your grocery store, the plain ones will work just fine. I like the sweetness of these Hawaiian rolls, and they also have a richer color after baking.

You can also use any combination of meat and cheese – turkey and pepper jack, ham and Swiss, pepperoni and provolone…

fullsizeoutput_8b5

Separate the crescent dough into 16 triangles, and cut the cheddar slices in half cross-wise to make 16 triangles. Place a cheese triangle and 2-3 slices ham on each crescent dough piece, then roll up starting from widest end.

fullsizeoutput_8b4

Place the roll-ups on a greased baking sheet and brush the tops with melted butter. Bake at 375 degrees for 15-20 minutes, or until tops are golden brown.

fullsizeoutput_8b3

That’s it! So easy! This recipe makes 16 roll-ups, so if you don’t need that many, just use one can of crescent rolls instead of two.

fullsizeoutput_8b8

I served mine with honey mustard for dipping, but they would also be wonderful dipped in ranch or spicy mustard. I hope your family enjoys these as much as mine did!

Thanks y’all!

– Nikki


Quarantine “Coq au Vin”

10751349392_IMG_1938

“Coq au Vin” is French for “chicken with wine,” and it’s a great meal for being in quarantine. It involves several steps so it takes a little longer to make, which is perfect when you have nothing but time! It smells wonderful, it tastes delicious, and it looks beautiful, so it’s sure to impress whoever you’re cooking for. (Even if you’re only cooking for yourself!)

10751092960_IMG_1926

This cooks in a Dutch oven, which is a cast iron pot with a lid, but if you don’t have one a large pot will do just fine. The traditional recipe also calls for some ingredients that I couldn’t find during quarantine, so I made a few substitutions. I’ll list the traditional ingredients, and then tell you what I substituted. Here’s what you’ll need:

  • chicken with skin on and bone in – I used chicken thighs because dark meat holds all the flavors in well
  • 1 bottle red wine
  • 1 pint mushrooms (I left these out because my kids don’t eat mushrooms)
  • 1 bag frozen pearl onions (I couldn’t find the pearl onions in store so I used a yellow onion chopped up – the little pearl onions look very pretty in this dish though if you are able to find some)
  • 1 cup chicken stock
  • 1-2 tbs herbs de provence (This is a French seasoning that includes rosemary, oregano, thyme, lavender, etc – I was out of it, so I used Italian seasoning instead, along with a little Tony’s seasoning since I put that on everything!)
  • salt and pepper
  • 4 sprigs fresh thyme (I actually did have this in my herb garden, but they also sell it in the produce section of grocery store)
  • 5 cloves garlic, minced
  • 4 slices bacon
  • 2 tbs olive oil
  • 2 cups flour

Start by heating the olive oil in Dutch oven (or large pot) on medium heat, then add the bacon and cook until crisp. When the bacon is done cooking, remove it to a plate and set aside.

10751092144_IMG_1927

Season the flour with salt and pepper, then dredge the chicken pieces in the flour mixture and brown on both sides in the bacon drippings. The chicken will finish cooking later, so you only need to cook it about 5 minutes on each side, just long enough to give it some color and crispness.

fullsizeoutput_770

I used a large pack of 12 chicken thighs, so I had to brown them in 2 batches. Remove the chicken to a plate and set aside after browning.

Add in the onions, garlic and thyme and saute a few minutes until tender, scraping the bottom of pot to mix in the bacon and chicken drippings. You can also add a little more salt and pepper now if you’d like. If you’re using mushrooms, this is when they go in too.

10751090752_IMG_1931

Once the vegetables are tender, add the chicken and bacon back in, along with the chicken stock and whatever spices you are using.

fullsizeoutput_771

Now add the entire bottle of red wine. Bring it to a boil, then cover and reduce heat to low and simmer about 20-30 minutes until the chicken is cooked all the way through. The alcohol will cook out, leaving just the color and flavor from the wine. Leave the lid to pot or Dutch oven slightly off to allow the steam to escape.

fullsizeoutput_773

You can also add carrots or celery if you’d like, or any other vegetable you have on hand.

If you’re a fan of Grey’s Anatomy, you may remember an old scene where Mark made “coq au vin” and Callie dumped it in the trash because she had brought pizza home for her and Arizona. I’ve always thought that if Callie knew how much trouble it was to make this dish that she wouldn’t have thrown it away!

fullsizeoutput_772

This chicken comes out with a deep color from braising in the wine, and a whole lot of flavor. So if you’re looking for something fancy to cook while on quarantine, I hope you’ll give this a try!

Thanks y’all!

– Nikki


New Orleans Bread Pudding

fullsizeoutput_6db

My husband and I recently had the opportunity to go to New Orleans to watch LSU win the National Championship (Geaux Tigers!), and if you’ve ever been down there, you know how incredible the food is in the French Quarter. We ate at one particular place that I had never been before, and the food there was SO amazing that I bought a cookbook on my way out.

fullsizeoutput_6d8

The restaurant is The Court of Two Sisters on Royal Street, and the building is just as beautiful as the food. It was the governor’s mansion in the 1700’s, so it has a regal and elegant look to it, while the canopy made of wisteria over the patio dining section gives it a casual and relaxing look also. It was one of those places that you weren’t in a hurry to leave, even when you were finished eating.

I tried several things there, including crawfish pasta salad, prime rib over grits, and a pineapple mimosa, but my favorite thing was their bread pudding. It wasn’t flashy, and it didn’t have any special sauce on top, but it was the best I’ve ever tasted. I knew this bread pudding was the first thing I was going to make from my new cookbook when I got back home.

Here’s what you’ll need:

  • 1 24-inch loaf of day-old French bread
  • 3 cups milk
  • 2/3 cup golden raisins (I substituted pecans for the raisins, and the pecans made this even better!)
  • 1/4 cup salted butter, melted (Real butter, not margarine)
  • 4 eggs
  • 1 cup sugar
  • 1/2 tsp vanilla
  • 1 tsp cinnamon
  • 3/4 tsp nutmeg
  • 1/2 tsp salt

I know, it feels like you gained two pounds just by reading the ingredients, but we have to indulge every now and then! “Everything in moderation,” and it only takes a small serving of this to fill you up.

The first step is to “scald” the milk in a large pot, meaning heat it just until it’s about to boil. Remove it from the heat and let it cool a couple of minutes, then add the melted butter and begin to tear the bread into 1-inch pieces and add it as well. The bread will begin to sort of dissolve in the hot milk, making it easier to blend than if the milk was cold. Add in the raisins (or pecans!) next and stir well.

fullsizeoutput_6d6

In a separate bowl, beat the eggs, then stir in the vanilla, cinnamon, sugar, nutmeg and salt. Add to the bread mixture, then spread evenly into a 13×9 greased baking dish.

fullsizeoutput_6d7

You can see that my mixture looks “chunky,” and the bread pudding at the restaurant did not. Theirs had a smooth texture, so I’m thinking they either used a potato masher or an electric mixer to blend their ingredients. However, it tasted exactly the same as theirs after cooking, so I didn’t mind the “chunks!”

Bake at 350 degrees for 1 hour 10 minutes, or until top begins to brown and form a “rough crust.”

fullsizeoutput_6d9

Most people make a vanilla sauce or a whiskey sauce to put on top of bread pudding, but this recipe is plenty moist without a sauce. My family does like to put some vanilla ice cream on top though!

fullsizeoutput_6da

I hope you enjoy this New Orleans dessert as much as my family and I did. Even though we can’t just travel to New Orleans whenever we want, we can at least bring some flavors of the French Quarter into our home with recipes like this. The Court of Two Sisters Cookbook is also available on amazon.com, and it has many more great recipes!

fullsizeoutput_6db

Thanks y’all!

– Nikki


Mom’s Kitchen Remodel

I have been updating my mom’s house one room at a time for the past year, and it was finally time to tackle something big – the kitchen! Most of the rooms in her house just needed some fresh paint, new curtains, and de-cluttering, but the kitchen was a whole different story. EVERYTHING in her kitchen needed updating, but with a limited budget it was tricky.

fullsizeoutput_62f

This is what I had to work with – see what I mean?!? The linoleum was originally white when I lived here as a child, but over the years it had yellowed. The cabinets were in pretty good shape, but were grease-stained and faded, and don’t even get me started on that horrible cabinet hardware!

10777194208_IMG_1810

The popcorn ceiling was really uneven, and the air vents were stained, as well as the ceiling near the vents.

fullsizeoutput_62c

The countertops were really old and pieced together, the white kitchen sink was all scratched up, and I had no idea what was happening on top of the counters – there was just random stuff everywhere.

The biggest issue for me was that EVERYTHING was white! White walls, white countertops, white cabinets, white floors, white appliances…

As you can see, her kitchen definitely needed help! I had been doing her easier rooms first because this kitchen was just so overwhelming, and I had no idea where to even start. Also my mom isn’t used to change, so she was just as overwhelmed.

Mom and I sat down and talked about what she liked and didn’t like about her kitchen, and came up with a game plan. She really likes white (obviously!), so we decided to keep a good bit of white in there, with some subtle shades of gray on the walls and curtains, and add some color and texture on top of the counters.

Even with a game plan, it was still overwhelming, so I decided to just start at the top and work my way to the bottom. I hand-scraped the popcorn ceiling until it was even, painted it with a fresh coat of white paint, and spray painted the air vents white so they looked new again. This was very time-consuming, but it made a HUGE difference! Even though the ceiling was the same color as before, having it clean and bright made the entire room look bigger and more cheerful.

She wanted to keep her white cabinets, so I painted them a fresh coat of white and replaced her hardware with something more modern.

The fresh paint made the cabinets look new again, and the new hardware made a HUGE difference! This was also MUCH cheaper than buying all new cabinets.

Next I painted the walls. I talked her into a light gray, something subtle but that was NOT white!

fullsizeoutput_62e

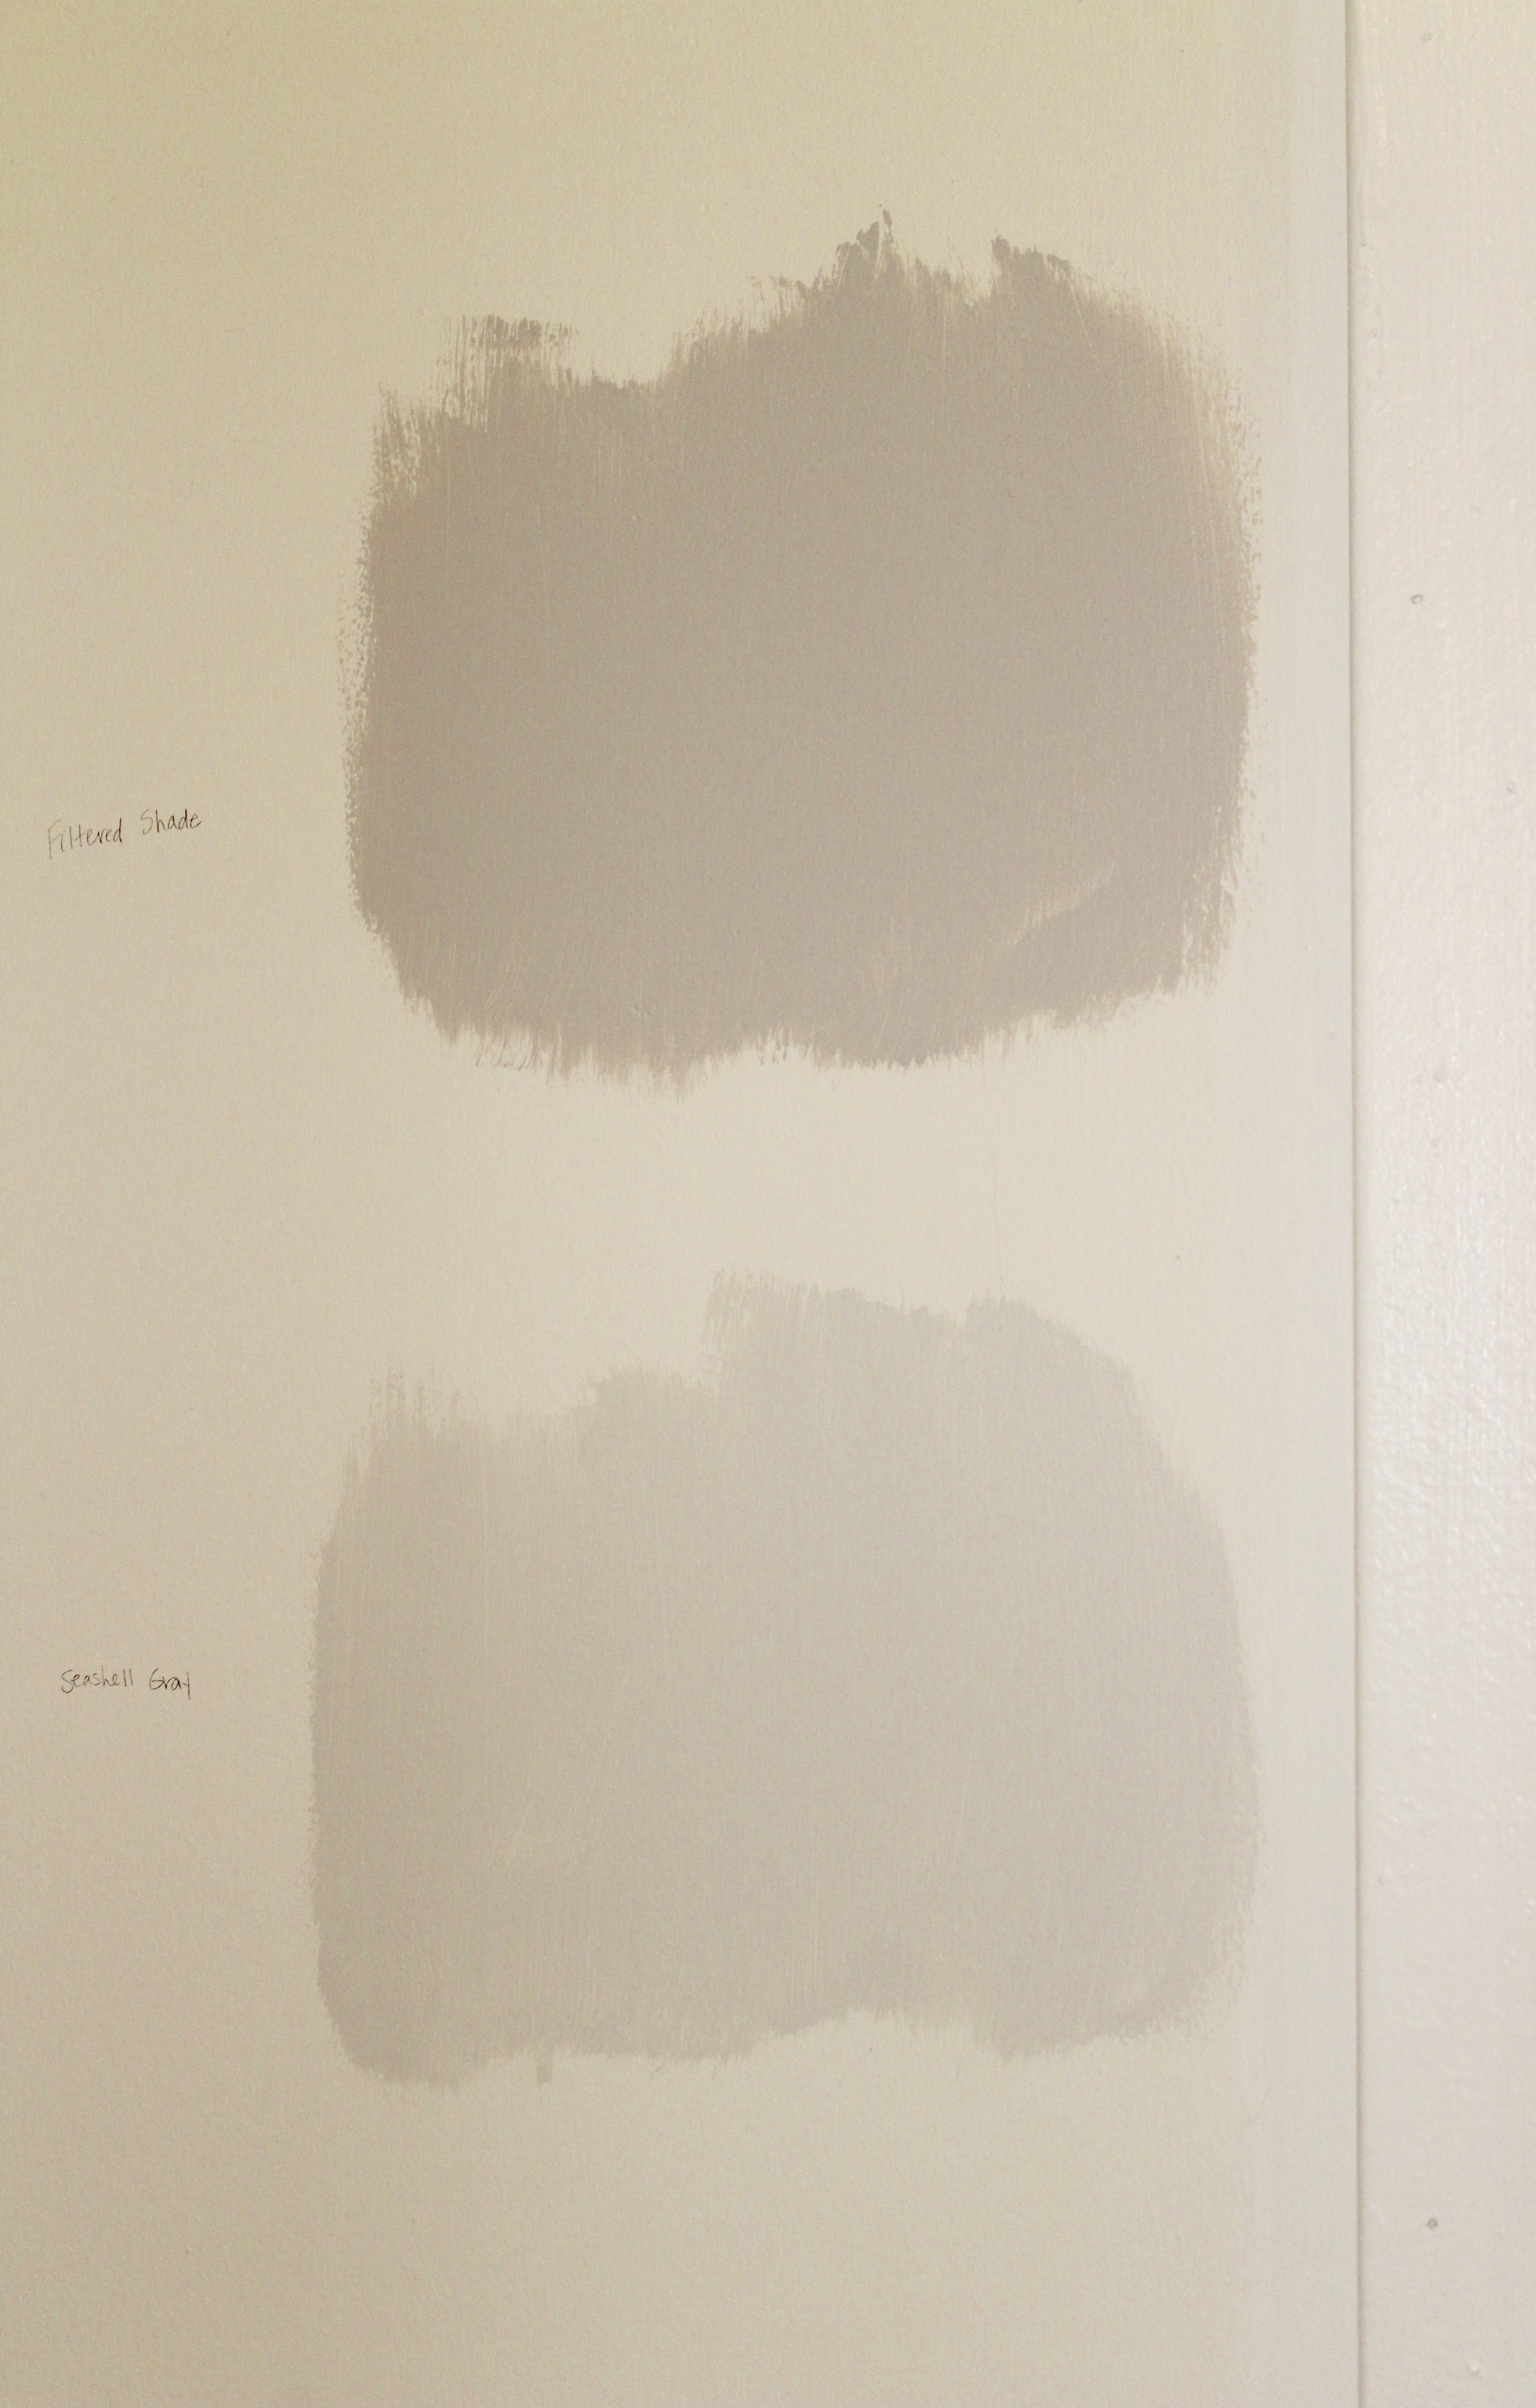
I put two samples on the wall for her to choose from, and she chose the lighter gray. It ended up perfect. I gave all the trim a fresh coat of white paint, so the gray really stood out against it, but it was such a light shade of gray that it wasn’t too much of a change for my mom.

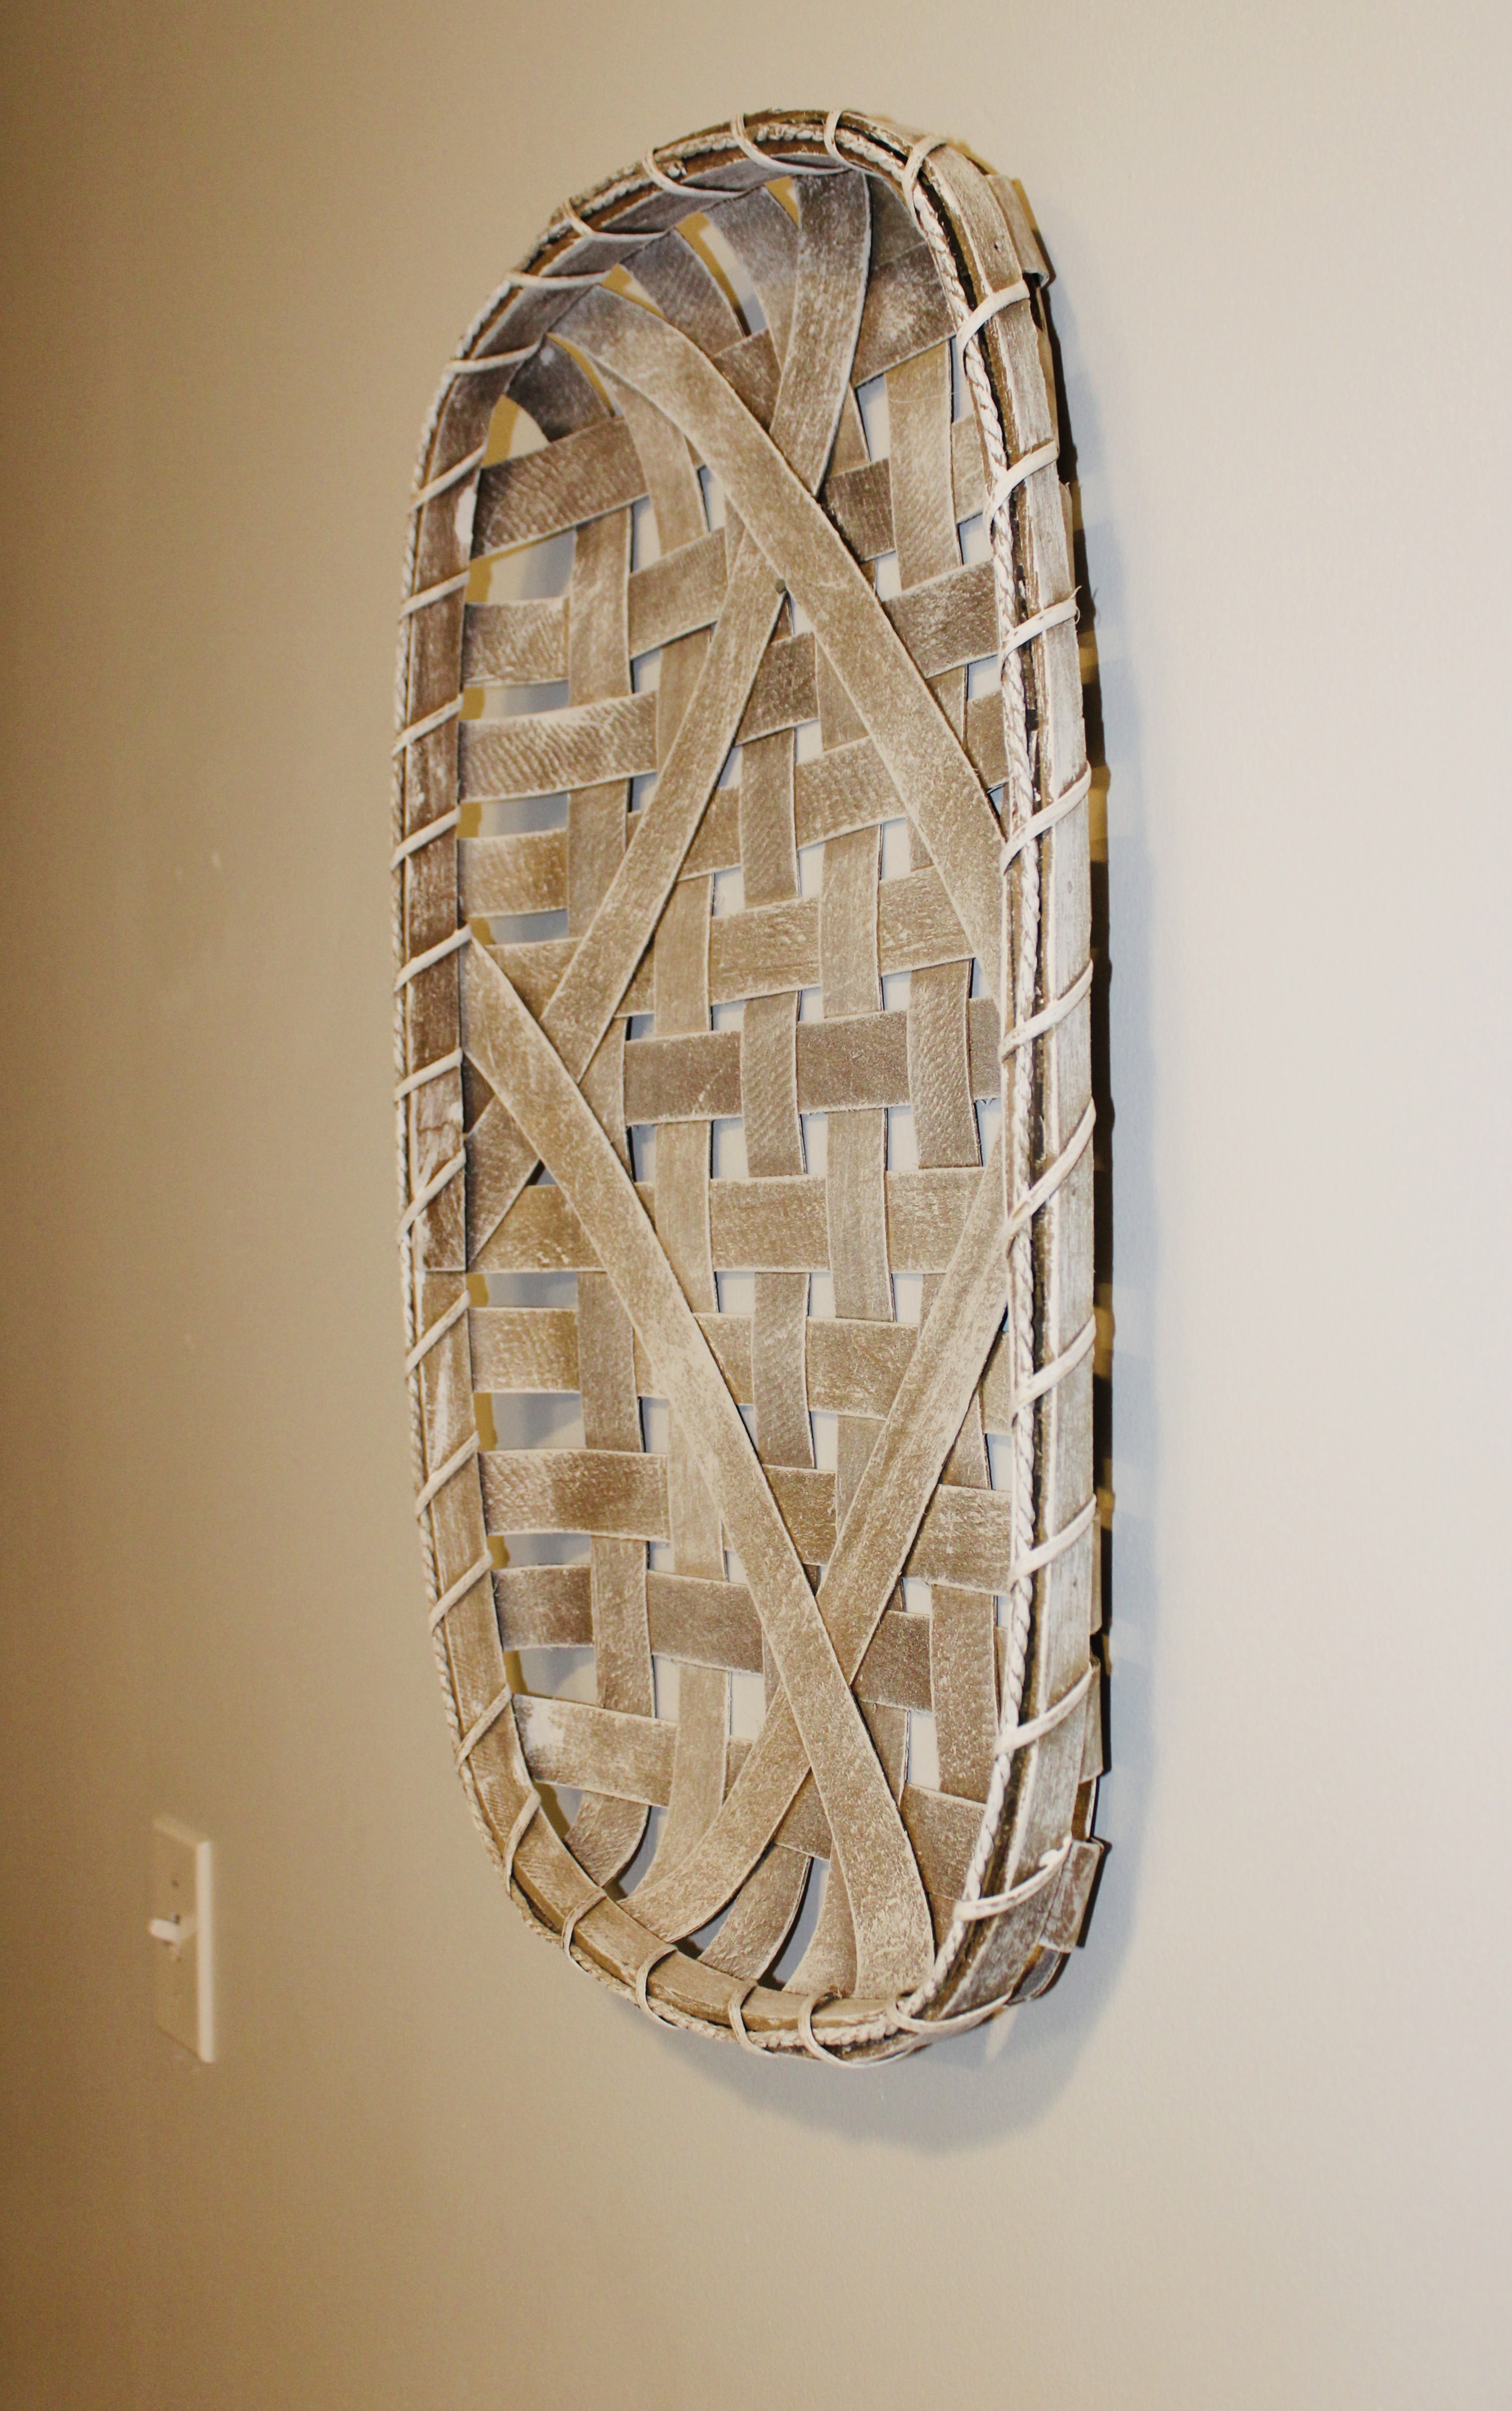
She had a lot of framed prints on her kitchen walls, and I talked her into letting me replace them with some other things that would add some texture and warmth to the room, like this basket and metal medallion.

fullsizeoutput_621

10777192768_IMG_1888

Next came the countertops. I can paint, decorate, do minor handy work, etc. but I am definitely not a professional installer, so we went to a local countertop place to complete the next phase of her kitchen remodel. She was nervous to stray from white, so we found a white stone that had just a bit of gray swirling through it. We went with quartz countertops instead of granite or marble, because quartz is much cheaper and has hardly any upkeep. They also replaced her scratched white sink with a stainless steel sink, and we got her a new faucet that was bigger and more modern than her old one.

Next I took EVERYTHING off her counters, made her choose what she couldn’t live without, and tossed everything else. I mixed in her old stuff with some new things to give her countertops some color and texture, but not too much so that it didn’t look cluttered.

fullsizeoutput_626

When I showed her the “before” pictures, she was amazed how much cleaner everything looked now without so much junk on the counters.

Now the only thing left to do were the floors. Again, I’m not a professional, so I just helped her pick them out, and my brother-in-law installed them. I told her she needed something that added warmth and texture to the kitchen, since everything else in there was white or gray. I suggested a wood laminate, and she picked one that had some gray tones in it since the walls were a light gray now.

fullsizeoutput_622

Now all the white in her kitchen isn’t so bad, because it’s anchored with this beautiful new floor.

fullsizeoutput_619

She was so excited about her “new” kitchen that she decided to even update the white appliances to stainless steel to match her new sink!

fullsizeoutput_61e

This room took quite a bit of planning, and definitely more than one weekend for me to complete, but look at the difference in the before and after pictures!

My mom is so happy when she walks into her kitchen now, and that is what matters. Our home SHOULD make us happy.

If you are unhappy with your kitchen, but don’t have the time or the budget to completely remodel it, consider small changes instead. Just changing your cabinet hardware out, decluttering your countertops, or even putting out a new dish towel can make a big difference in the appearance and feel of the room.

Next comes my mom’s living room (which currently has pine wood paneling!), so stay tuned for another room transformation!

Thanks y’all!

– Nikki


Chicken with 40 Cloves of Garlic

This classic French dish is sure to impress everyone, and it’s not hard at all to make. Even though there is a ton of garlic, it cooks slowly to flavor the creamy sauce so it’s not overpowering. This dish is rustic, beautiful, and delicious!

IMG_1719

There are a ton of recipes out there for this meal, but this is how I’ve always made mine.

Ingredients:

  • 40 cloves garlic, peeled
  • 8 chicken thighs, bone-in and skin-on
  • 1 cup white wine
  • 2 tbs olive oil
  • 2 tbs butter
  • salt and pepper
  • 1/2 cup chicken stock
  • 2 tbs heavy cream
  • 2 tbs flour
  • fresh thyme

Preheat a dutch oven (a large cast iron pot) with the butter and olive oil over medium heat. If you don’t have a dutch oven, you can use a regular large pot, but the cast iron cooks the chicken better.

IMG_1721

While that is heating, season chicken with salt and pepper. I use chicken thighs because they are cheaper and also more flavorful, but any bone-in chicken will work. Brown the chicken on both sides in heated oil and butter, then remove to a plate. You may have to do this in two batches if your pot isn’t big enough. You don’t want to cook the chicken all the way through, just enough to give them good color – they will finish cooking later in the sauce.

IMG_1722

While the chicken is browning, peel your garlic cloves. 40 cloves of garlic sounds like a lot, but it really isn’t since they are so small. If you have some larger cloves you can cut them in half. It’s worth the few extra minutes to use fresh garlic and not the kind in a jar – there is a big difference in the taste.

IMG_1720

After the chicken has been removed from the pot, lower the heat and add in the garlic, stirring the cloves around to scrape up the chicken drippings. Saute them about 5-10 minutes, until they turn a golden color. Your kitchen will smell amazing!

IMG_1723

Next add in the wine and chicken stock, and turn the heat back up until it comes to a boil. If you don’t have white wine in the house, you can use the “cooking wine” from the grocery store (on the aisle with the vinegar), but the kind you would actually drink adds so much more flavor. All of the alcohol cooks out, so don’t worry about your kids getting “buzzed” from this chicken!

After the mixture comes to a boil, add the chicken back in, along with the thyme.

If using fresh thyme, there is no need to take the little leaves off the stem – they will fall off naturally while cooking, and then you can just pull out the stem from the pot. If using dried thyme, only use a small amount since dried herbs are much stronger than fresh.

Put the lid on your dutch oven or pot, lower heat and simmer about 30-45 minutes until chicken is completely cooked. Remove the chicken once again to a plate, along with the thyme stems if you used fresh.

Spoon out about a cup of the the sauce into a bowl and whisk in the flour to it, then add it back to the pot, stirring until the sauce becomes thicker. (If you add the flour straight to the sauce it will be lumpy.) Stir in the heavy cream, then add chicken back to pot and garnish with another sprig or two of the thyme.

IMG_1725

This takes a while, but it’s mostly just waiting on the chicken to cook completely. It makes a beautiful dish with so much flavor, and it’s sure to impress everyone!

Thanks y’all!

– Nikki


Crock Pot Shrimp and Sausage Boil

Here in Louisiana, we love our seafood! But when the temperature is close to 100 degrees, outdoors is the last place we want to be while cooking. So … enter the crock pot!

A while back my mother-in-law asked me if I had ever heard of boiling shrimp in a crock pot. I had not, but the idea sounded fantastic, so I looked on Pinterest and found several recipes for it. After weeding through them all, I took bits and pieces from a few of the recipes, as well as adding some of my own ingredients and techniques, and came up with this…

fullsizeoutput_4ed

Not only was this super easy, but the kids absolutely loved it! The amount of ingredients that fit into the crock pot was perfect for a family of four.

Here’s what you’ll need:

  • 1-2 lb large shrimp, raw with shell on (I used gulf shrimp)
  • 1 bag Zatarain’s crawfish, shrimp and crab boil
  • 1 lb smoked andouille sausage, sliced
  • 1-2 lb baby red potatoes
  • 4 small frozen corn on cob (or 2 large fresh cut in half)
  • 1 lemon, cut into wedges
  • 1 whole bulb garlic, cut in half (don’t worry about the skin – it will mostly dissolve while cooking, and it’s not to eat anyway, just for flavor)
  • 1 yellow onion, quartered
  • 2 tsp Tony’s seasoning
  • 2 tsp salt
  • 1 stick butter
  • fresh chopped parsley

fullsizeoutput_4ec

Place everything in crock pot EXCEPT for shrimp, lemon, butter and parsley, and then cover ingredients with water. Cook on low for 6-8 hours.

Several of the recipes I looked at called for cayenne pepper, lemon pepper, etc. but I didn’t want this dish to be too spicy for my kids, especially the corn and potatoes. With just the Tony’s and the bag of shrimp boil I thought it was just spicy enough with plenty of flavor, but you can always add any seasoning you’d like.

fullsizeoutput_4ef

Last, add in the remaining ingredients and turn crock pot to high. Cook about 30 more minutes, then serve immediately so the shrimp don’t overcook, removing seasoning bag before serving.

fullsizeoutput_4ee

The shrimp were perfect, the sausage was delicious, and the corn and potatoes had a sweet taste from the butter and onion but also a savory taste from the spices. I served mine with garlic bread and a pasta salad, and it was a hit with my family!

So next time you’re craving boiled shrimp, remember to get out your crock pot, because this couldn’t be any easier! And it will definitely impress whoever you’re cooking for!

Thanks y’all!

– Nikki


Easy Cream Cheese Dip

If you’re looking for something easy to bring to a work party, baby shower, tailgate, or any other kind of get-together, this is it. This dip is delicious, and only has THREE ingredients!

IMG_1569

My mom used to make this for get-togethers, and now that I’m an adult, I can make it anytime I want and not have to wait for special occasions!

IMG_1570

Here’s what you’ll need:

  • 2  8-oz packages of cream cheese (I use the 1/3-less-fat kind and you can’t taste the difference)
  • 1 package sliced beef (I use the Carl Buddig brand – it’s less than $1!)
  • 1 bunch green onions with ends trimmed

Chop up the green onions and the beef and stir into the softened cream cheese – THAT’S IT!!! It literally takes less than 5 minutes to make, and it is SO GOOD!!!

IMG_1571

We like to dip Wheat Thins in it, but any cracker will do. You can also spread it over tortillas, then roll them up and slice for easy tortilla roll-ups, or stuff it into celery slices for a healthier snack.

I hope you enjoy this delicious dip as much as my family does!

Thanks y’all!

– Nikki


Herb Garden

“Plant gardens and eat what they produce.”

– Jeremiah 29:5


Every spring, we Southerners plant our vegetables and our flowers, but many people forget about planting herbs. Herbs can be used in so many ways, and most of them are just as fragrant as flowers. You can incorporate them into your vegetable garden or your flower beds, or you can plant them in pots indoors or outdoors. And the best part is that they are very hard to kill, so even the worst gardener can grow them!

MINT:

fullsizeoutput_426

Mint is by far my favorite herb. My grandma had this growing in her backyard when I was a little girl, and every time I smell mint leaves I am transported back in time to when she was alive.

Mint is best grown in pots, because if you plant it directly in the ground, it will spread and take over your yard. It is a natural repellent for certain rodents and bugs, so it is good to have close to your house, or even indoors.

Not only does it smell amazing, but it is also a great way to add flavor to summer drinks.

fullsizeoutput_428

Add a few mint leaves and lemon slices to your ice water for a refreshing summer drink…

fullsizeoutput_429

…or put a few in your glass of sweet iced tea. If you crush the leaves between your fingers first, it will help to release the flavor even more.

fullsizeoutput_422

And don’t forget about mint juleps and mojitos!

BASIL:

fullsizeoutput_424

Basil is my second favorite herb. It has a sweet smell, and is mostly used in Italian dishes or to make pesto sauce. It smells so good that sometimes I’ll pick some just to put in a vase in the kitchen.

blog3 021

A little fresh basil sprinkled on top of pasta not only gives it a fresh taste, but also makes it look like a fancy restaurant dish!

Basil can grow really tall – when it starts to get little flowers on the top of the plant, that means it’s time to trim it down so that the leaves don’t start to get thick and hard.

DILL:

fullsizeoutput_42a

Dill is most popular for making dill pickles, but it can be used for so much more. I like to add freshly chopped dill to ranch dressing for a bolder taste, and I also like to put it in pasta salad for extra color and flavor.

fullsizeoutput_421

You can also toss crackers or pretzels with dill and oil and bake them a few minutes for a more flavorful snack.

ROSEMARY:

fullsizeoutput_425

Rosemary is another strong smelling herb that I sometimes put in a kitchen vase just for the aroma. I mostly use this one in marinades for grilling pork or chicken.

10753507568_img_1162

Just slide the leaves off and chop them up to add to your marinade – don’t use the woody stem.

PARSLEY:

fullsizeoutput_427

Parsley is probably the most versatile herb, because it doesn’t have a strong flavor. It is mainly used as a garnish just to give dishes extra color and texture. You can pretty much sprinkle chopped parsley on top of anything to liven it up.

I like to put it in homemade salsa. I don’t like the taste of cilantro, which usually goes in salsa, so I replace it with parsley instead.

10740902880_IMG_1808

These are just a few of my favorite herbs and their many uses – there are lots more out there that you can experiment with. So this summer while you’re planting your flowers and vegetables, don’t forget to plant a few herbs as well. It’s so nice to step outside and cut a few sprigs of a fresh herb to add to your drink or your meal to make it more special, or to just add to a vase of flowers for extra aroma in your home.

Thanks y’all!

   – Nikki


Cheesy Sausage and Rice Casserole

My 10-year-old, who is a very picky eater, asked if I could make this every week after he tasted it for the first time. I guess he didn’t notice it had celery and onions in it!

This meal is perfect for busy weeknights, because it doesn’t take long to cook and it makes enough for leftovers the next night. Since it’s baseball season we tend to eat out a lot this time of year, which can get expensive. Cooking something the night before saves money, time, and gives your family something home-cooked.

img_0996.jpg

Here’s what you’ll need:

  • 2 lbs ground sausage
  • 1/2 yellow onion, chopped
  • 3-4 stalks celery, chopped
  • 2 cans cream of chicken soup
  • 1 can chicken broth
  • 1 1/2 cups uncooked rice
  • 1 cup shredded cheddar cheese (or more if you’d like!)

Start by browning the ground sausage in a large skillet. When it’s cooked all the way, scoot it over to one side of the pan and saute the onion and celery in the sausage grease. (If there isn’t enough grease just add a tablespoon of butter or oil.) You can add a little seasoning at this point – I usually add cajun seasoning, but if you don’t want it spicy you can just use salt and pepper. Once the vegetables are tender, stir in the cream of chicken soup and chicken broth, then the rice and cheese. If your skillet isn’t deep enough to stir everything in, you can just transfer the cooked sausage and vegetables to a large mixing bowl.

Now pour the mixture into a greased 13×9 baking dish, cover it with foil and bake at 350 degrees for about 45 minutes, or until rice is cooked. You have to cover the dish with foil or the rice won’t cook evenly, so don’t forget that step.

IMG_0997

Throw in some garlic bread or a biscuit and you have a meal! Since this uses sausage, it would also be a good breakfast casserole, and since it makes so much, it would be a good dish to take to someone you’re helping out.

I hope your family enjoys this meal as much as mine did! And I hope this gives you moms out there an idea for those busy weeknights.

Thanks y’all!

– Nikki