Homemade Dill Pickles

pickleblog-d5-mrpstees 017

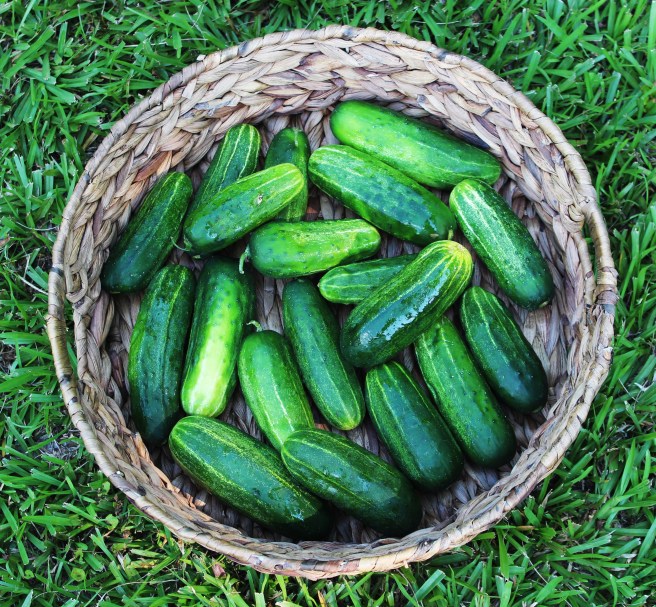
Whenever I see fresh cucumbers in the summer, all I can think about are fresh homemade pickles! They taste so much better than store-bought pickles, and are not hard at all to make.

pickleblog-d5-mrpstees 047

As a child, one of my favorite places to be was my neighbor Ann’s house. Ann was like another mother to me. She taught me how to cook, how to fish, how to cross stitch, how to drive, and how to make the best dill pickles in the world. Some of my best memories of growing up involve her, and this is her recipe.

All you need is vinegar, water, salt, garlic, dill seed, and of course cucumbers.

pickleblog-d5-mrpstees 018

Dill seed comes in a tiny plastic container and can be found in the spice section of your grocery store. It’s different than dill weed, an herb that comes in a larger jar. The seeds are more potent and give the pickles their sour dill flavor. (Apparently everyone is making pickles this weekend because I had to go to three different grocery stores before finding some!)

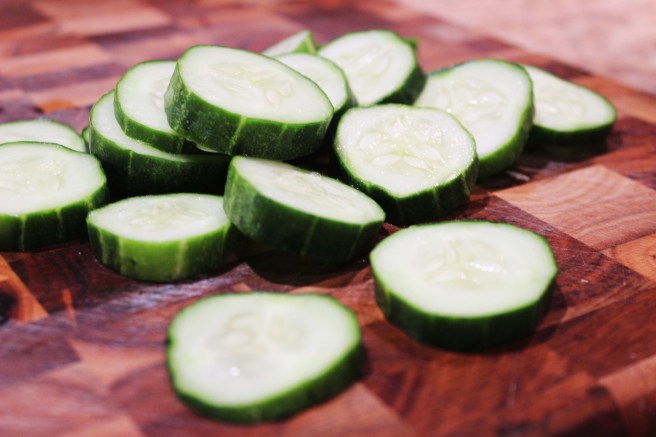
Start by peeling your garlic cloves  – you will need about 3-4 per jar. Next slice your cucumbers however thick you want your pickles to be.

pickleblog-d5-mrpstees 041

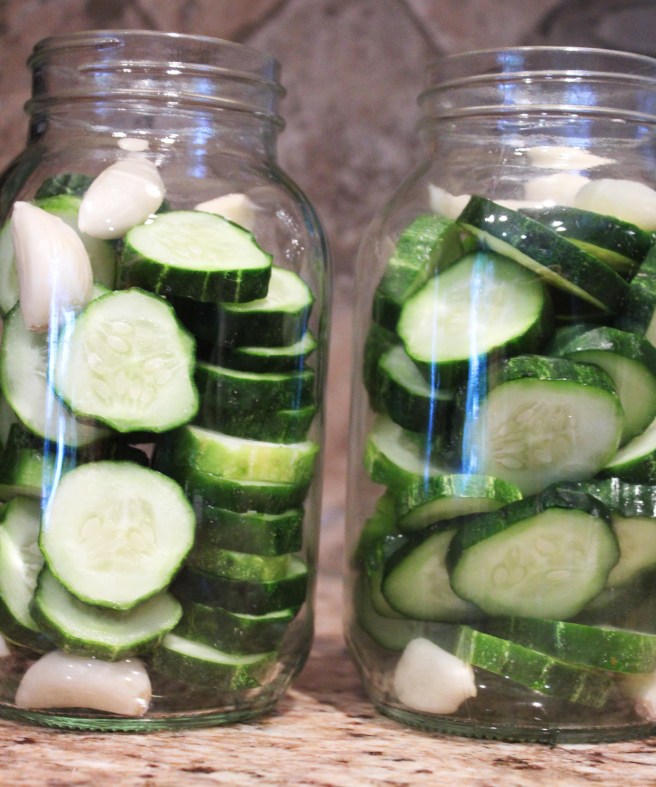
Place 2 garlic cloves in the bottom of each jar, then fill with sliced cucumbers the rest of the way. Top off with 1-2 more garlic cloves.

pickleblog-d5-mrpstees 042

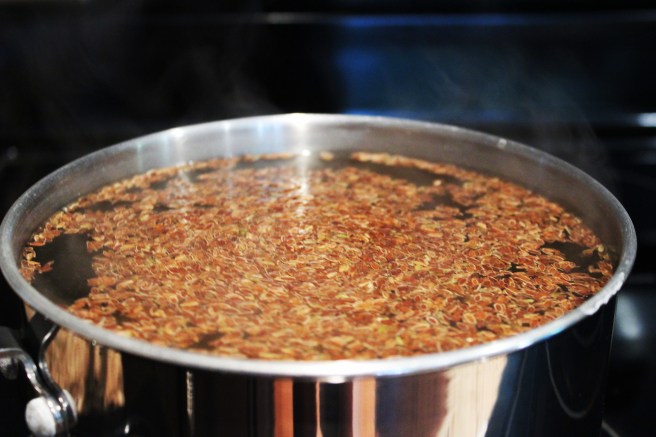
Next is the pickling liquid – pour 2 parts water to 1 part vinegar in a pot. (I used 2 quarts water and 1 quart vinegar for 5 jars.) Add in 3/4 cup salt and half of the container of dill seed, then bring to a rolling boil, stirring occasionally to dissolve the salt.

pickleblog-d5-mrpstees 044

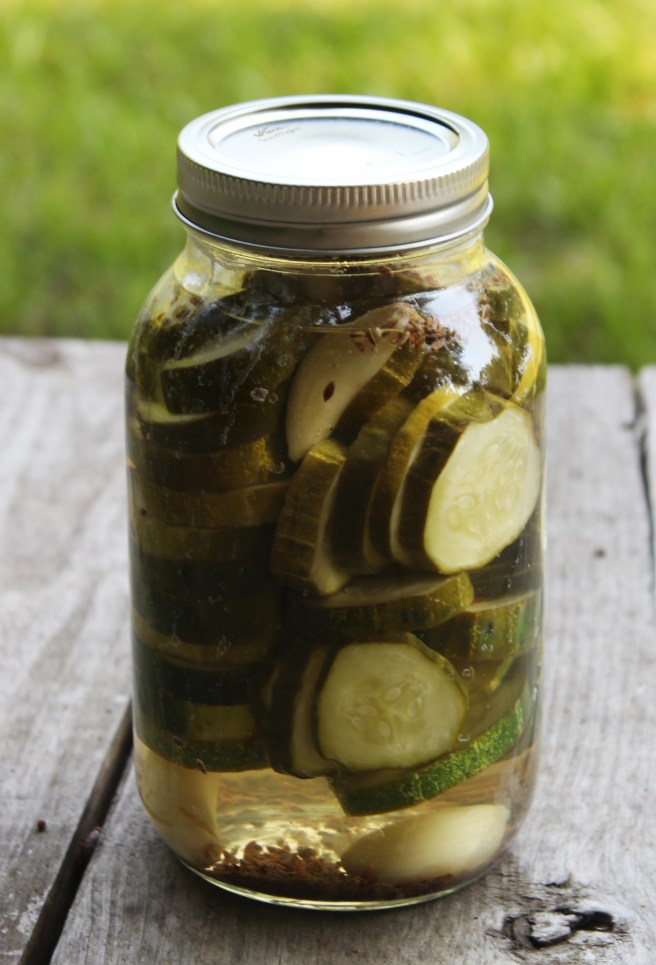
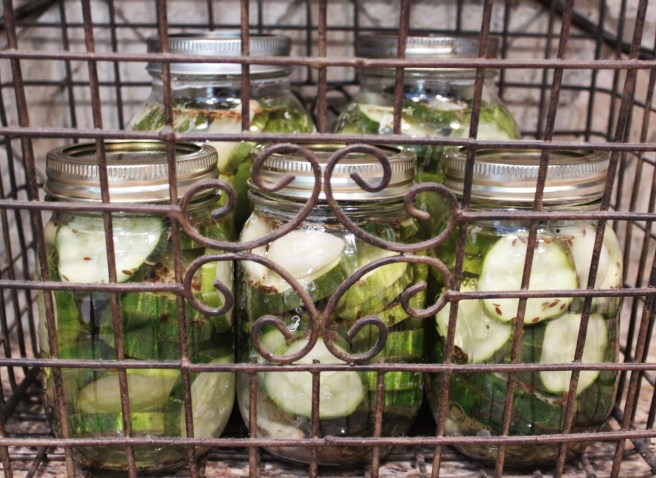
Once the liquid is boiling, pour into jars over cucumbers. (You can use a funnel if your aim is not so great!) Pour a little more dill seed in the top of each jar, about 1/2 teaspoon, then screw lids on tight.

pickleblog-d5-mrpstees 046

Store in a cabinet until the cucumbers turn a darker green, usually about a week, then they are ready to enjoy!

pickleblog-d5-mrpstees 045

Every summer when I eat these homemade pickles, I think of my sweet neighbor Ann and how much fun we had when I was a little girl.

pickleblog-d5-mrpstees 049

I hope you enjoy them as much as I do!

Thanks y’all!

– Nikki


Easy Summer Berry Cobbler

It’s summer, which means fresh fruits and vegetables! We have a mulberry tree in our yard, as well as lots of dewberry bushes growing along the edge of our woods, so yesterday I racked up on fresh berries…

mrpstees-cheercamp-cobblerblog 051

Usually I just eat these with a little bit of sugar, but I was feeling industrious this time and decided to make a cobbler.

What makes this cobbler so easy is the crust – why spend valuable weekend hours making dough from scratch when Pilsbury makes a pefectly good pie crust?!?

mrpstees-cheercamp-cobblerblog 053

You will need 2 pie crusts – one for the bottom and the other for the top of the cobbler. (Most refrigerated pie crusts come in a box of 2.) Press the first crust into a baking dish and set aside while making the filling.

mrpstees-cheercamp-cobblerblog 052

In a saucepan, combine 3 cups berries (I used mulberries and dewberries but any kind will work), 2 tbs butter, 2 tbs flour, 1/2 cup sugar and 1/4 cup water. Bring to a boil on the stove and cook for just a few minutes until it thickens up.

mrpstees-cheercamp-cobblerblog 054

After the mixture was done cooking, I also added a dash of vanilla extract and a few sprinkles of cinnamon.

mrpstees-cheercamp-cobblerblog 055

Pour the filling into the crust and top with the remaining pie crust, pinching the edges to seal. I brushed the top crust with a little melted butter and then sprinkled a little sugar on top – this gives the top of the cobbler a little extra sweetness and texture.

mrpstees-cheercamp-cobblerblog 056

Now bake the cobbler at 400 degrees for about 20 minutes, or just until the crust begins to brown.

mrpstees-cheercamp-cobblerblog 057

Serve it warm with vanilla ice cream for the perfect fresh summer dessert!

mrpstees-cheercamp-cobblerblog 064

There was room in mine for probably double the filling, so if you have extra berries you can double the filling recipe. This would also work for other fruit besides berries, like peaches or apples. Tastes like summer!

Thanks y’all!

– Nikki


Pasta with Deer Sausage

It’s baseball season, which means late nights at the ballpark and fast food for supper. I’ve been trying to cook suppers on our off-nights that will make leftovers, so we aren’t eating out as often, and this is something I came up with using ingredients I already had on hand.

sausage pasta blog 048

We have a freezer full of deer meat, and I was thinking of a new way to use this sausage. I looked in my pantry and saw a box of bowtie pasta, and then came up with this…

sausage pasta blog 051

It’s just a cheesey pasta with sausage in it, but it’s so good! The kids loved it too!

Here’s what I used:

  • 1 lb deer sausage (or any kind of link sausage)
  • 1/2 onion, chopped
  • 2 cloves garlic, chopped
  • 1 lb pasta (I used bowtie but any shape will work)
  • 1 can Rotel
  • 1 cup shredded cheese (I used Monterey Jack)
  • 2 tbs flour
  • 2 cups chicken stock
  • 1/2 cup heavy cream (or milk if you don’t have cream on hand)

Start by boiling the pasta, then drain it and set aside. While the pasta is boiling, slice the sausage and cook it in a deep skillet. When the sausage is cooked, add the garlic and onion and saute until they are tender. If the sausage didn’t produce enough grease to cook the vegetables in, add a little oil or butter. Season with salt and pepper.

sausage pasta blog 049

(I used onion and garlic because those were the only vegetables I had, but this would also be good with bell pepper, celery, or any other vegetables.)

Next add in the 2 tbs flour and stir until it is mixed in, then add the chicken stock. Stir until it begins to thicken, then add in the Rotel, cheese, and heavy cream. Continue stirring until everything is combined.

sausage pasta blog 050

(When making sauces I like to grate my own cheese – it seems to melt better than the pre-shredded kind that comes in a bag.)

Once the cheese is melted into a creamy sauce, toss in the drained pasta, then serve with garlic bread.

sausage pasta blog 054

This was easy to make, and tasted amazing! You can change things up with this recipe by using different vegetables or a different kind of cheese – pretty much whatever you have on hand will work.

Thanks y’all!

– Nikki


Garlic Butter Roast Chicken Thighs

If your family is anything like mine, they LOVE chicken! So I’m always looking for new ways to cook it, so it doesn’t feel like we are eating the same chicken dish every week. This one is very easy, very juicy and flavorful, and inexpensive to make. The color you see underneath the skin of this chicken thigh is from a mixture of butter, garlic, seasonings and herbs stuffed inside. You can use whatever seasonings and herbs you have in your pantry, and even change it up each time to create entirely different flavors.

chickenblog 011

**I use chicken thighs for this, because they are cheaper than chicken breasts and have more flavor. If you decide to use chicken breasts instead, you may have to cook them a little longer since they are usually bigger than the thighs.**

Here’s what you’ll need:

  • 8 chicken thighs (bone-in and skin-on!)
  • 1 stick butter
  • 2-3 cloves garlic
  • seasonings of you choice (I used salt, lemon pepper and Tony’s)
  • herbs of your choice (I used dill and Italian seasoning)
  • oil for brushing

**In the spring and summer I use fresh herbs that I grow outside, but since it’s winter I used dried herbs from the store. If you’re using fresh herbs, you may have to add a little more of them since the flavor will not be as strong as the dried type.**

Start by letting the butter soften at room temperature until it mixes easily. Mince the garlic cloves (or I used a grater to get the smallest pieces possible) and add to the butter. Next add your seasonings and herbs. I never measure these – I just add in whatever I feel like at the time. If I had to guess, I’d say maybe a tablespoon of each ingredient? The more you add, the more flavor the chicken will have. Now just mix with a spatula until everything looks combined evenly.

chickenblog 001

Now loosen the skin from the top of each chicken thigh, and stuff a good amount (1-2 tbs) of the butter mixture under the skin. Then tuck the skin back under the chicken to seal in the butter mixture.

After all the chicken thighs have been stuffed, brush a little oil over the tops and sprinkle with salt and pepper.

Arrange the chicken on a wire roasting rack on top of a cookie sheet or baking dish, and bake for an hour at 425 degrees. The butter will melt underneath the chicken skin to make it juicy, and the herbs will stay tucked under the skin to give it lots of flavor.

chickenblog 008

If the chicken is completely cooked, but the skin doesn’t have the pretty golden brown color, you can always turn your oven to broil for just a few minutes to crisp the skin.

chickenblog 009

And don’t forget you can change up what herbs and seasonings you use each time to create entirely different flavors. You could give it an Italian flavor, a Mexican flavor, a Greek flavor, a barbecue flavor, a citrus flavor – the possibilities are endless!

chickenblog 010

If you’ve been in a “chicken rut” lately, I hope this recipe has given you some inspiration!

Thanks y’all!

– Nikki


Grandma Freddie’s Peanut Butter Fudge

pbfudgeblog 035

I was going through some old recipes the other day and came across this one for my grandma’s peanut butter fudge. It was locally known as “Freddie Fudge,” (my grandma’s name was Freddie), and she got asked to make it at least once a week by someone. She kept the recipe a secret for years, but eventually gave it out, although no one has ever been able to make it taste quite like hers!

pbfudgeblog 027

One thing I do remember is that she always used Jif peanut butter, so I used it as well. My batch came out pretty close to what hers used to taste like, but it still wasn’t the exact same. Maybe it was just having the best grandma ever cooking it that made it taste so good!

Here’s what you’ll need:

  • 1 16-oz jar peanut butter (I used creamy, but you can also use crunchy if you want some added texture from the peanuts)
  • 1 cup milk
  • 2 cups sugar
  • 1 tbs vanilla extract

Start by bringing the sugar and milk to a rolling boil. You will need a larger size pot because the mixture will get frothy and “grow” as it boils.

pbfudgeblog 030

After it comes to a rolling boil, turn the heat down to low-medium and keep boiling for about 10 minutes, whisking occasionally. You want the heat high enough for it to bubble the entire time, but not so high that it boils over.

Next remove the pot from the heat and whisk in the peanut butter and vanilla. Once the mixture is smooth and creamy, spread it evenly into a greased 13×9 dish.

pbfudgeblog 031

Allow the fudge to cool completely – it will harden up as it cools.

pbfudgeblog 032

Once it has completely cooled, cut it into small squares and serve!

pbfudgeblog 034

These little squares are very rich and sweet, so I can usually just eat one, although my husband managed to eat four at one time!

pbfudgeblog 033

Every time I take a bite of one of these, I’m 7 years old again standing in my grandma’s kitchen. I love how certain tastes and smells can take us back in time to when things seemed much simpler. I hope you and your family enjoy this recipe as much as we do!

Thanks y’all!

– Nikki


What do I do with all this deer meat in my freezer?!?

If your freezer looks anything like mine, it is FULL of deer meat. That’s a good problem to have though – venison is much leaner and healthier than beef, and also much cheaper since you are able to “harvest” your own!

The frustration comes when you find yourself cooking the same thing over and over with it, so I thought I’d share a few different ways we like to cook it at our house.

Let’s start with the deer steaks…

This is the usual way to cook deer steaks – FRIED! And while they are delicious cooked like this, it can get monotonous eating them every week. Another delicious way to eat them is cooked in a crock pot with gravy, served over rice or mashed potatoes. But MY favorite way to eat them is grilled…

deerblog1c

They are so small, so they only take about 15 minutes to grill, which is perfect for a busy weeknight. And grilling them is also much healthier than frying or covering them in gravy, which is perfect for everyone’s New Year’s diets!

deerblog

Most people think of wrapping these little steaks up with cream cheese, jalapeno peppers and bacon when they think of grilling them, and while those taste amazing, these are less time-consuming. I’ve discovered a “secret” marinade…

This CREAMY Italian dressing is the perfect marinade for grilling deer steaks. It’s thick so it sticks to the meat, keeping them from getting too dry while cooking, and also keeping the flavors locked in. Just soak the deer steaks in this dressing and then throw them on the grill – so easy! You can soak them a few minutes or all day – they come out just as flavorful either way. Sometimes I will add a little Worcestershire sauce and a few extra spices to the dressing, but it tastes great on its own as well. (Just be sure to get the CREAMY Italian – the regular Italian dressing doesn’t stick to the meat like the creamy kind does.)

And don’t forget the deer sausage while you’re grilling! (The jalapeno cheese flavor sausage is our favorite!)

Another kind of venison that gives me fits is the ground meat – there is only so much deer chili my family can eat. When you get a deer processed, it seems like most of it comes back to you as ground deer meat. Just remember you can use it for other things besides chili.

There is little to no fat in ground venison, so it’s much healthier than ground beef, and also easier to cook with since there’s no fat to drain after browning it. It can be used in anything ground beef is used for – hamburgers, tacos, spaghetti, patty melts, meatloaf, etc. I like to make baked ziti with it when I get bored with the usual ground meat recipes – it’s fast, it’s only got FOUR ingredients, and it’s covered in cheese!

tacobowlblog 003

All you need is 1 lb ground deer meat, 1 lb ziti pasta, 1 jar marinara sauce and 1 bag shredded mozzarella cheese. (I’m sure there’s a fancy recipe for this with many more ingredients, but this one tastes amazing so why get complicated?!?)

Brown the meat in a skillet, then stir in the marinara. (I buy the kind that has a few chunky vegetables in it so it looks like I actually spent time making my own sauce!) Then toss in the cooked pasta and half of the cheese, spread in a greased casserole dish and top with the remaining half of the cheese. Bake at 350 until cheese is melted.

tacobowlblog 002

Look at all that cheese!

I could write a book on all the ways I use our deer meat, but these two recipes are some of the easiest and fastest. I hope these ideas helped you answer that question we face every hunting season: “What do I do with all this deer meat in my freezer?!?”

Thanks y’all,

– Nikki

Mini Taco Bowls

tacobowlblog 004

Have y’all seen these miniature tortillas in the grocery store? They are precious! Of course I had to buy these cute little things, but at only a few inches wide, I had no idea what I was going to do with them…

tacobowlblog 012

I decided to try these adorable little taco cups, and they turned out fabulous!

I started out by pushing the tortillas down into cupcake pans to form the little “bowls.”

tacobowlblog 005

The mini corn tortillas I used tore a little bit while shaping them, but they still came out fine and held together well. The mini flour tortillas would probably hold up better since they are thicker, but their thickness wouldn’t allow for as much filling.

I then baked them at 375 until they were formed and slightly crispy, about 10 minutes.

tacobowlblog 006

I then filled them with pre-cooked fajita chicken and shredded cheese, and popped them back in the oven until the cheese melted.

tacobowlblog 009

You could also use taco-seasoned ground beef, fajita steak, or any other filling you’d like – just be sure the meat is already cooked.

tacobowlblog 010

I then topped them with sour cream and avocado and they were ready to serve. Aren’t they cute?!? The kids liked them because they could eat them with their hands, and I liked how quick and easy they were to make. (And did I mention they are cute?!?)

You can also use other toppings, like salsa, cilantro, diced tomatoes, black beans, etc.

tacobowlblog 012

Thanks y’all!

– Nikki


Fajita Chicken Tortilla Soup

chickentortillasoupblog 015

Fall is here, and soups are perfect for this cooler weather! This is one of my favorites because it’s a little more satisfying than most soups, with chunks of chicken and as much cheese as you want!

Here’s what you’ll need:

chickentortillasoupblog 002

  • 2 lbs chicken tenderloins
  • 1/2 onion, chopped
  • 1 red bell pepper, chopped
  • 1 jalapeno pepper, seeds removed and diced
  • 1 can fire-roasted diced tomatoes
  • 1 bag tortilla chips, crushed
  • 1 packet taco seasoning (I used the “chicken taco seasoning”)
  • 1 block Monterey Jack cheese, grated
  • 1 quart chicken stock
  • sour cream and chopped green onion for topping

chickentortillasoupblog 003

Start by heating about 2 tbs oil or butter in a large pot or dutch oven. While that is heating up, cut the chicken into bite-size chunks and toss in a bowl with the taco seasoning. When the pot is hot enough, add the seasoned chicken to the pot and cook completely.

chickentortillasoupblog 004

While the chicken is cooking, chop up the onion and peppers.

chickentortillasoupblog 005

After the chicken is cooked through, add the onion and peppers to the pot and cook about 5 minutes, until they have begun to soften. Next add the canned tomatoes and chicken stock. Simmer, uncovered, about 10 more minutes.

chickentortillasoupblog 008

Now it’s time to serve it up! Start by layering the crushed tortilla chips in soup bowls, then add the soup, some grated cheese, and top with whatever you’d like – I used sour cream and green onions. You could also use some sliced avocado.

That’s it! Now all you need is a spoon!

Although this is technically a soup, it is much more satisfying than most. The layers of chips, chicken and cheese give it so many different textures and flavors, and it is sure to warm you up on these cooler nights. And maybe most important, it’s easy to make!

chickentortillasoupblog 013

Thanks y’all!

– Nikki


Banana Blueberry Pie

2018calendar-pieblog 036

When I was a kid, my favorite thing about Thanksgiving was dessert. (Okay, that’s still my favorite thing as an adult too!) My grandma would make this pie for just about every holiday, and it is still one of my favorite desserts.

This pie is not keto, or vegan, or whole 30, or paleo… I doubt my grandma would even know what those words meant if she were alive today. This is just a really good pie!

Here’s what you’ll need:

  • 8 oz softened cream cheese
  • 1/2 cup sugar
  • 1 tub Cool Whip
  • 1 can blueberry pie filling
  • 3 bananas
  • 1 lemon
  • 1 refrigerated pie crust

2018calendar-pieblog 034

(If you are worried about all the calories, I have made this before with fat-free Cool Whip, fat-free cream cheese, and Splenda instead of sugar, and it tasted almost exactly the same. Or, you could just eat a really small piece!)

Start by baking the pie crust according to package directions and allow to cool completely.

Peel the bananas and slice them up, then squeeze some lemon juice over them (about half the lemon) and toss them around to coat. You don’t want to taste the lemon juice, you want just enough to keep the bananas from turning brown. Spread the sliced bananas evenly over pie crust.

Next mix the cream cheese, sugar and Cool Whip together and layer on top of the bananas. It’s best to use a mixer for this so it’s not lumpy.

Finally, layer the pie filling on top and refrigerate about an hour to let the pie set up.

2018calendar-pieblog 035

That’s it! This is super easy to make, and tastes amazing! I’ve tried using other flavors of pie filling on top, but the blueberry is my favorite. I’ve also tried using fresh blueberries, but the texture is much better with the pie filling.

2018calendar-pieblog 038

You could also use the cream cheese filling as a fruit dip. I hope you enjoy this pie as much as I do!

Thanks y’all!

– Nikki


Connor’s Jambalaya

jambalaya blog 013

My husband knows how to cook two things – grilled cheese sandwiches and jambalaya. Even though his grilled cheese game is pretty strong, the jambalaya is definitely my favorite thing he makes.

One year while we were on our family vacation at the beach, he met a guy from south Louisiana that was cooking jambalaya at our resort. My husband will talk to anyone, so he made friends with this Cajun man and learned how to make it himself. I’m glad he did, because this is the best jambalaya I’ve ever tasted! He gets requests to cook it all the time for football games and suppers at our deer camp, and the kids love it just as much as the grown-ups do. Here is his recipe…

  • 1 pkg boneless/skinless chicken breasts (3-4 breasts)
  • 1 lb link sausage, sliced
  • 1 can diced tomatoes (we use the fire-roasted kind)
  • 1 lb uncooked rice
  • 1 bell pepper, chopped
  • 1 onion, chopped
  • 5 cloves garlic, minced
  • 2 quarts chicken stock
  • 3-4 celery stems, chopped
  • 1 stick butter
  • sugar (the secret ingredient!)
  • seasonings of your choice (we use Tony’s, garlic salt, pepper and Tabasco)
  • cooking oil (either canola or vegetable)

Start by coating just the bottom of a large pot or Dutch oven with the oil. (This recipe will feed 6-8 people – if you want to feed more, double the recipe and get a larger pot!) Add 2 tbs sugar to the oil and turn heat on stove to low/medium. Allow sugar and oil to sit and caramelize, without stirring, until it turns light brown. Be careful not to let it burn. When I first found out Connor was putting sugar in the jambalaya, I thought he was crazy, but it turns out this is the secret to making it taste so good. It does not give a sweet taste to the dish, but instead helps the meat to caramelize and taste amazing!

While the sugar and oil are heating up, cut the chicken into bite-size pieces and season it to your taste. Once the oil is ready, add in chicken in batches, just to cover the bottom of pot in a single layer. Try not to stir chicken too much while it is cooking – allowing it to sit in the oil/sugar mixture will help it to caramelize just right. Connor says he “just flips it once.”

jambalaya blog 001

Once the chicken is cooked through, remove it to a plate or bowl and get ready for the next batch of chicken pieces. This is important – add more sugar (1-2 tbs) to bottom of pot in between each batch of chicken. This way each batch gets the same wonderful color and flavor.

jambalaya blog 002

Repeat until all of the chicken is used up, and then do the same thing with the sliced sausage, cooking in batches and adding sugar in between each batch.

jambalaya blog 003

Once all the meat has been cooked and removed from pot, add in the stick of butter and chopped vegetables.

jambalaya blog 004

Season vegetables to your taste, and cook on low/medium heat, being sure to scrape sides of pot while stirring to incorporate the flavors from the meat drippings. When I asked Connor how long to cook the vegetables, he said “until they are the color of a Bud Light beer bottle…”

jambalaya blog 005

This is how dark they should be – it should take about 15-20 minutes. You can’t overcook them. Once the vegetables look like this, add the meat back in pot, along with canned tomatoes.

jambalaya blog 007

Stir together, then add rice, more seasonings, and one of the quarts of chicken stock.

jambalaya blog 008

Bring to a boil, then reduce heat to low and cover with pot lid. Cook until rice is done, stirring occasionally and adding more chicken stock when needed.

jambalaya blog 006

The longer you cook it, the more flavor it will have, so don’t be scared to keep cooking it even after the rice is done. You will just have to keep stirring in a little extra chicken stock as you go.

jambalaya blog 009

This is very time-consuming, but it is so worth it! It tastes amazing!

jambalaya blog 012

We usually just use chicken and sausage, but you can use any kind of meat or seafood you would like – pulled pork, shrimp, crawfish, alligator, etc.

I hope you enjoy this jambalaya as much as our friends and family do!


Thanks y’all!

– Nikki