It’s my favorite time of year – CHRISTMAS!!! Family, food, Jesus’ birthday, gift-giving, and decorating! Christmas decorating can get expensive, so I thought I’d give y’all a few ideas that are on the cheaper side, but still unique…

Christmas card holders are in just about every store, but why not get creative with one? This is an old window shutter I found a few years ago at a junk store, and it just so happened to already be painted a lovely Christmas green color! AND it was distressed, giving it a nostalgic feel. The slats are perfect for sliding the cards into to display, and it was only $8 – much cheaper than a store-bought card holder.

Table centerpieces are another thing that can get pretty pricey, so I made this one myself. A friend had given me this cream and gold cake stand last year, and it made the perfect starting point for a centerpiece.
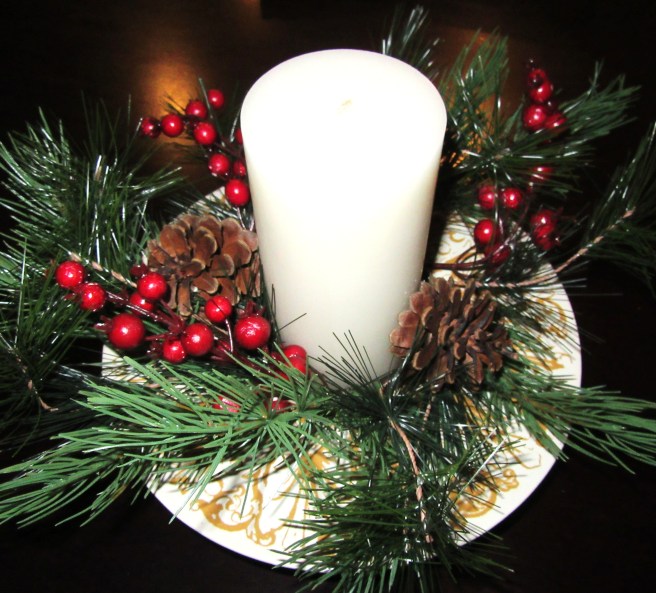
A cheap $2 candle, some pine cones, and some greenery from the dollar store, and now it’s a perfect centerpiece for the kitchen table. And even better, it’s not so tall that you can’t see the person sitting across from you at dinner!
The couch sometimes gets forgotten in the decorating process, but changing out the pillows to Christmas colors can really tie the room together.
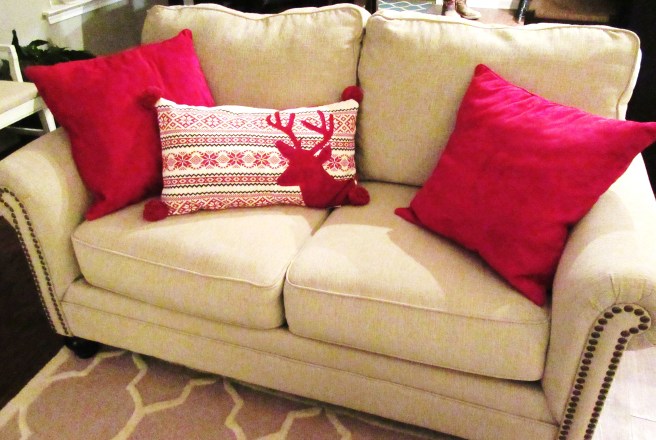
Our usual pillows are turqouise and cream, but changing them to red makes a huge difference. This inexpensive change makes a huge difference in giving the whole house that holiday feel. I found these red velvet pillows at Bed Bath and Beyond, and the deer pillow at T.J. Maxx.
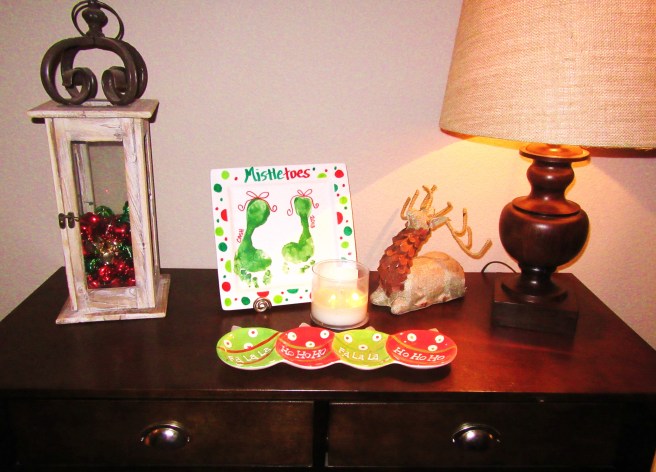
You can also accent pieces you already have, rather than bringing in new pieces for the holidays. This wooden lantern stays out year-round, but for the holidays I filled it with cheap Christmas bells from the dollar store.

You could also use small ornaments or candy canes, and vases or urns would work just as well.
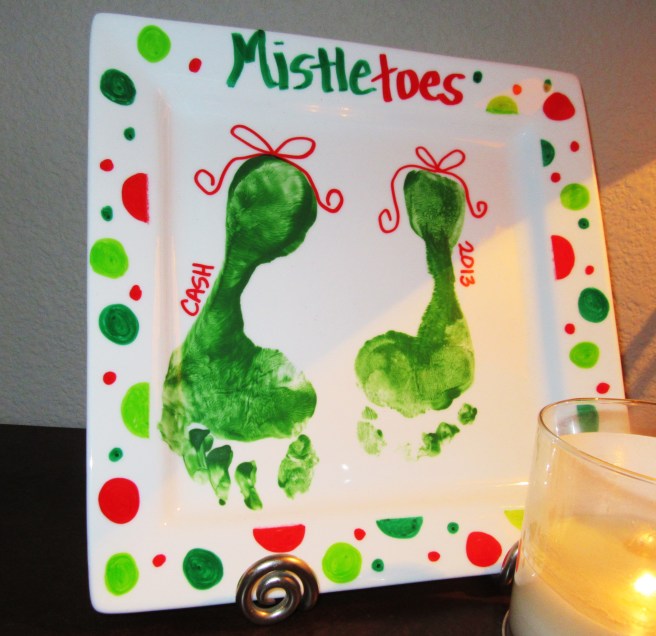
I made this plate a couple of years ago with my son’s footprints. The plate came from Walmart and was only about $2. Some red and green Sharpie markers and green paint on his feet, and now we have a keepsake to display every year.
And speaking of keepsakes, here is an easy way to display all of your Christmas cards from years before – just punch a hole in the corner of the cards and tie with a Christmas ribbon.


You can keep these on the coffee table, and it’s fun to look back at them and see how everyone has changed over the years.
Christmas ornaments are another thing that can get expensive, but wrapping your tree with burlap ribbon (about $3 for one roll at Hobby Lobby) gives it a custom and rustic look, and then you don’t need quite as many ornaments to fill the tree.
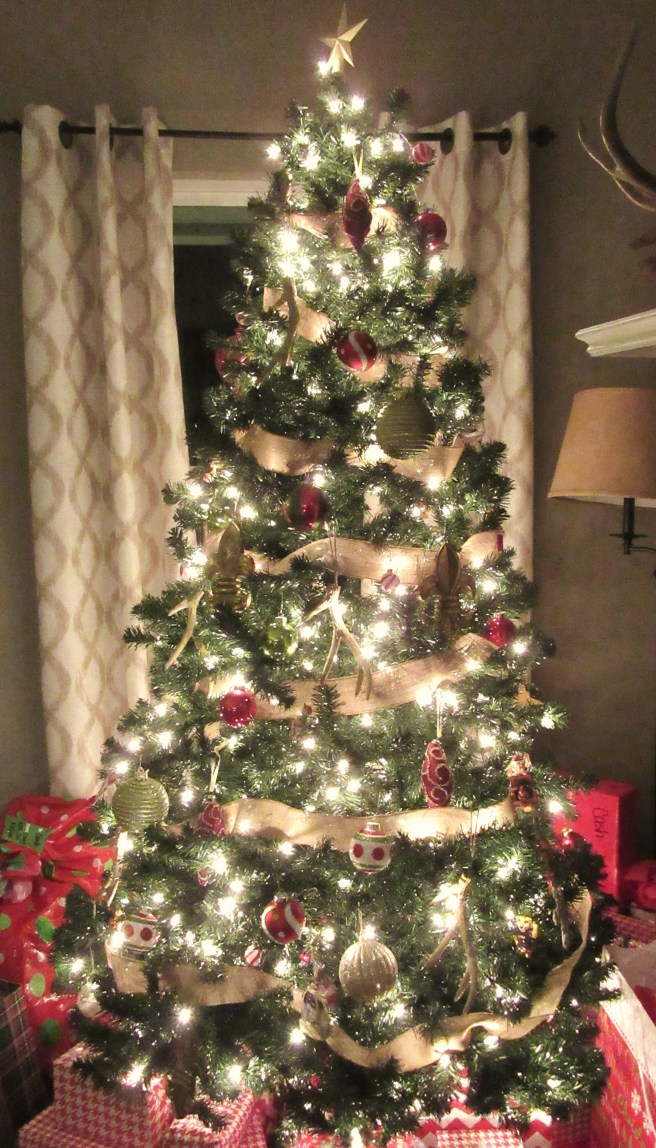
Most of these ornaments are from the dollar store, but the burlap makes them stand out and look more expensive
And of course if you have kids, you get free hand-made ornaments!

Pine cones are another free decoration, especially if you live in Louisiana like I do! I gather some every year from the woods behind my house to use as filler.

I had these pre-lit miniature trees for the flower urns on my front porch, but they were too small. But add some pine cones around them, and…

…now they are the perfect size!
Small signs are another inexpensive way to pull your house together for the holidays. Most dollar stores have really cute ones these days. I got this one at World Market for my pantry door for only $6!


The Christmas decoration I am most proud of though is our family’s stockings. I cross stitched these for us, and my mother-in-law sewed them together for us.

They are beautiful, and something special that will be in our family each year.
So when it comes to decorating for the holidays, don’t panic! Look around your house for things you can use, and hit your local dollar store for some cheap ideas. And save your money for gift-giving instead! But most importantly, remember the real reason for the season, the birth of Jesus Christ.
Thanks y’all!
- Nikki
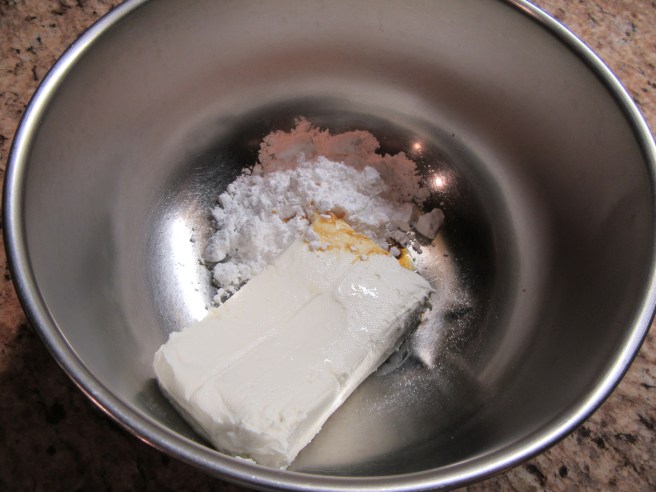
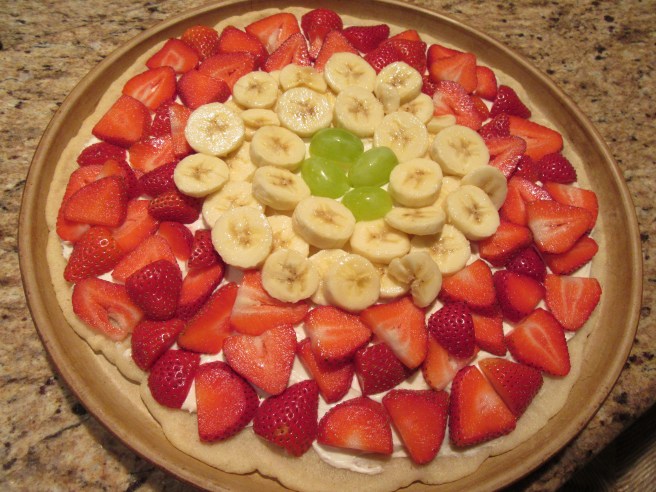
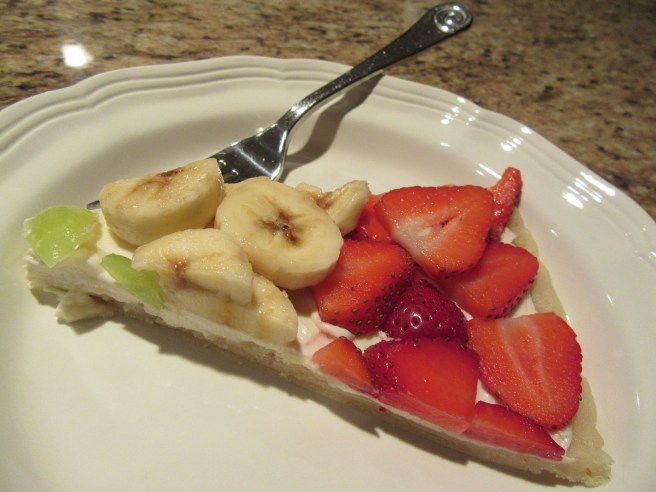
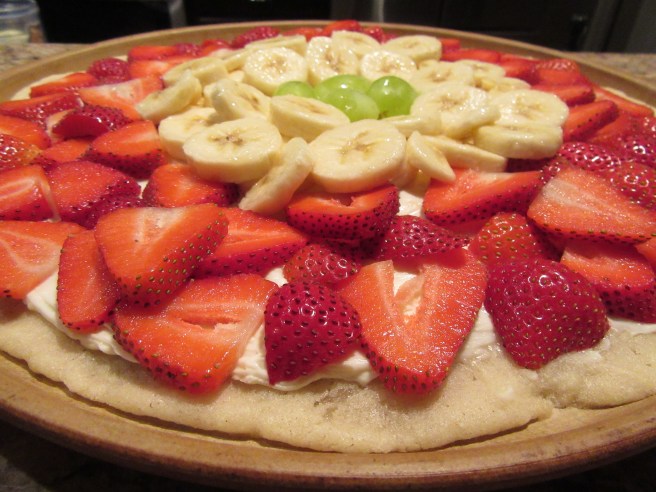 This is my kids’ absolute favorite dessert! (Hey, it’s healthy if it has fruit on it, right?!?) This “pizza” is so easy to make – here is what you will need: sugar cookie dough, cream cheese, powdered sugar, vanilla extract, and fruit.
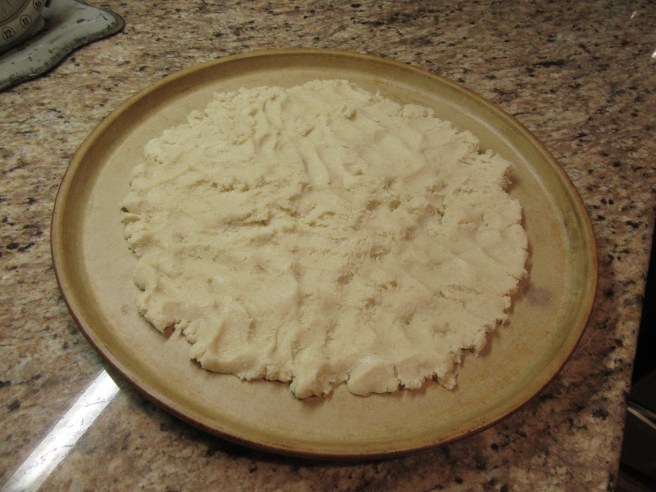 Using your hands, spread the dough out on a cookie sheet evenly, making one giant cookie. I use the stone kind because it cooks more evenly and does not stick, but a metal one will work fine. Be sure to leave a little room around the edge since the dough will expand when it cooks.
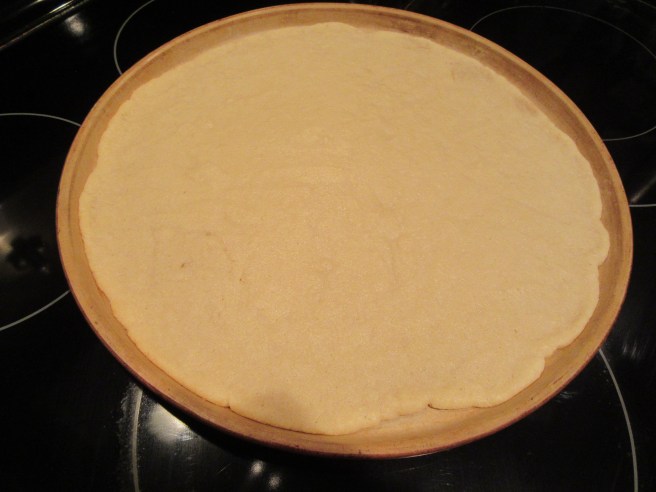 Bake at 350 degrees for 10-12 minutes. The cookie should still be soft. This will be the “pizza crust.” Allow to cool completely.