Decorating on A Budget

If you’re like me, you want a Southern Living magazine-worthy home, decorated perfectly, but also cozy and family-friendly. If you’re like me, you don’t have a ton of extra money to spend on decorating your home. Let me show you some ways to add character to your home, by using things you can find lying around outside, repurposing cheap finds, shopping at discount stores, and even making some things yourself.

Let’s start in the kitchen, the heart of the home…

blog - dec on budget 010

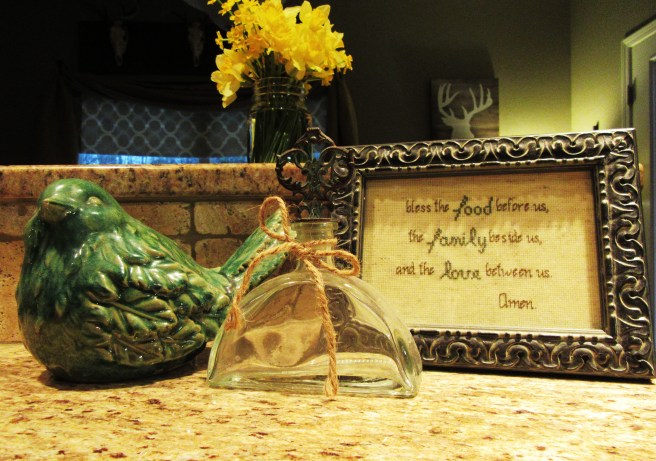
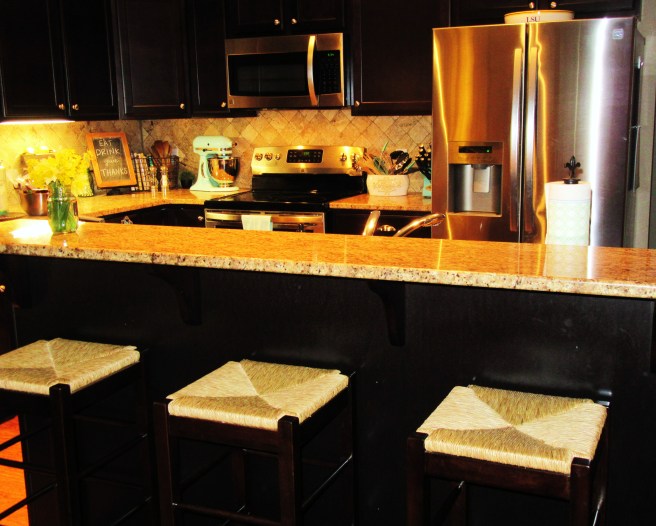
Picture this island without anything on it – boring, right?!? All browns, no color. But, add a cute dish towel ($3 from Target), a mason jar full of wildflowers picked from the side of the road (free), and a cute little turquoise ceramic bird ($6 from local store – Beehive in Ruston, LA), and for less than $10 that boring island is transformed into a bright and welcoming area.

blog - dec on budget 011

Another way to add color and warmth is to add rugs. I know rugs can get pricey, but if you take the time to shop around, you can usually find one that won’t break your budget. There are many websites with cheap rugs, and discount stores like T.J. Maxx and Marshall’s always have some really unique ones for good prices.

blog - dec on budget 056

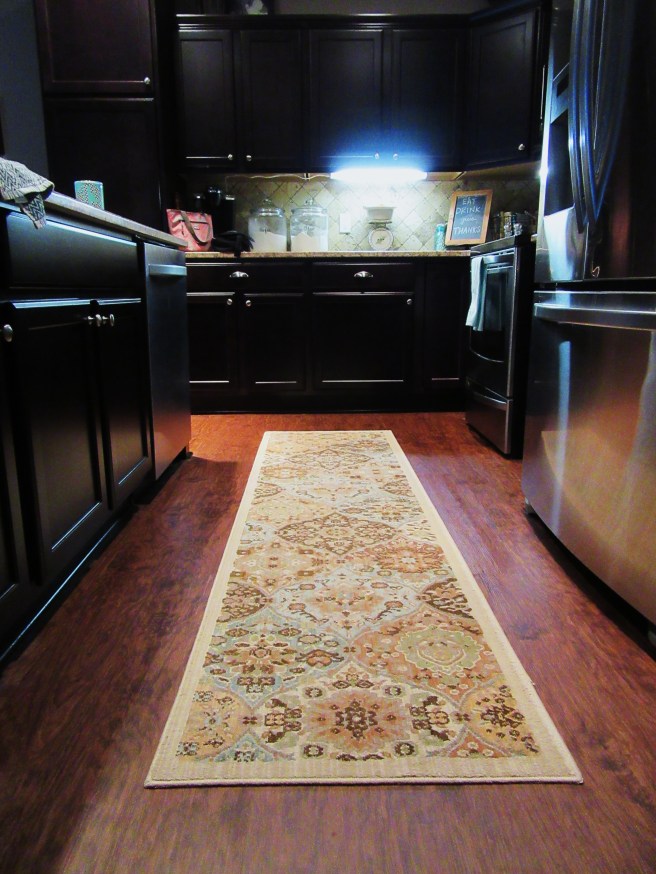
These runners are usually fairly cheap, and fit perfectly in kitchens.

blog - dec on budget 012

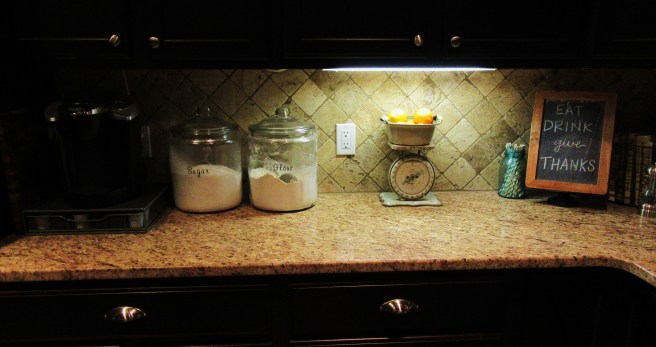
Another good place to find unique decorations is your local junk store. We have several in my area, and I love to stop in and look around. You never know what you may find! I had been coveting an antique aqua-colored food scale like this one for a while, but they were all over $50, WAY out of my price range! So you can imagine how excited I was to find this one at my local junk store for only $10! They were practically giving it away!

These sugar and flour canisters are actually glass cookie jars from Walmart that I labeled using scrapbook letter stickers, and the chalkboard was $6 from Hobby Lobby. I like being able to change out what is said on the little chalkboard, whether it is a Bible verse, the week’s menu, or any reminders for the family.

blog - dec on budget 059

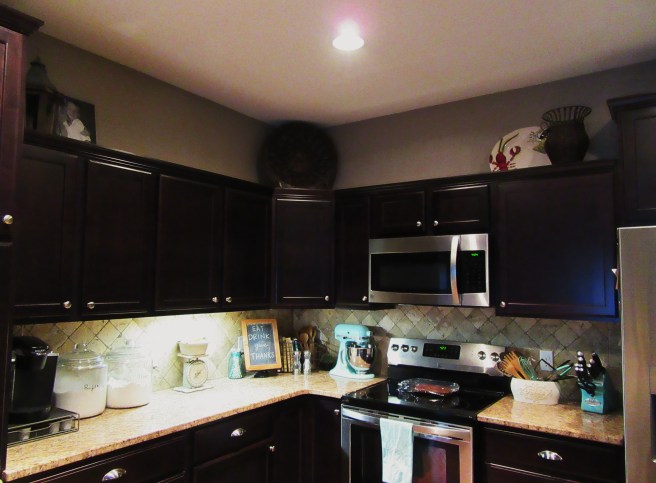
One of the hardest areas to decorate is above the kitchen cabinets. When it comes to this area, my philosophy is “less is more.” If the entire tops of the cabinets were filled up, I think it would make the space look smaller and just plain cluttered. (It looks like I need to take my own advice and apply to the countertops! Maybe I will do some de-cluttering this weekend!)

blog - dec on budget 014

The main thing to remember when decorating your kitchen is to make it inviting to YOURSELF. If you have to be in there to cook, wash dishes, and put up groceries, a warm and colorful kitchen may just make those tasks a little more enjoyable.

Now on to the living room…

blog - dec on budget 043

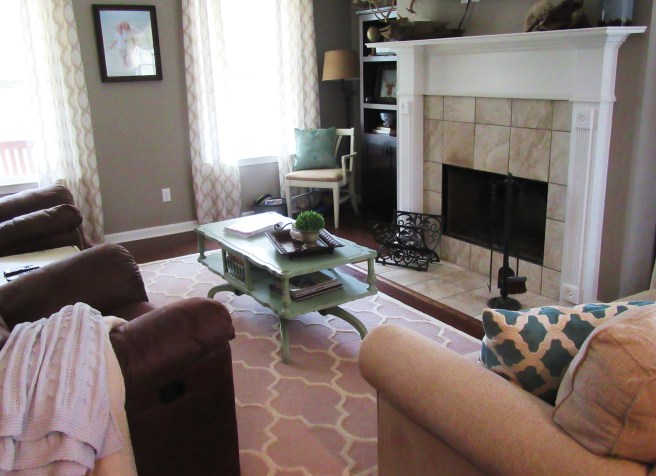
We have several things in this room that we actually FOUND outside and used to decorate – can you spot any of them in this picture?!?

blog - dec on budget 035

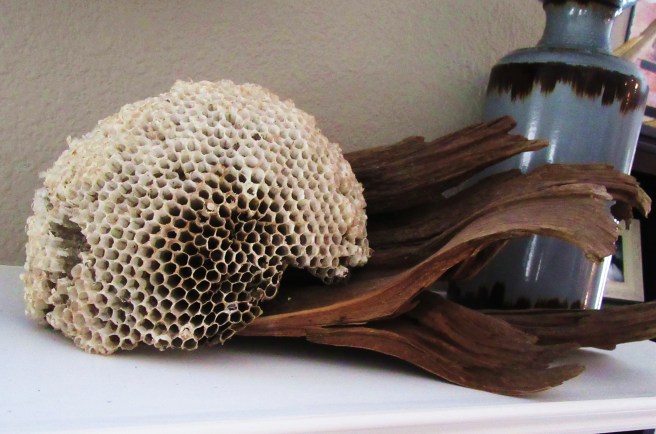
This beautiful piece of wood we found in the woods, and it is now sitting on top of our mantel. And yes – you are looking at a wasp’s nest. You may not can tell from this picture, but it is HUGE! I would have never thought to put a wasp’s nest indoors, until I saw a picture in a fancy architecture magazine with million-dollar homes using them as decorations! (No one was harmed in obtaining this nest – we waited until winter to get it when all the wasps were gone!)

Deer antlers are another thing we have plenty of around here. Our entire family hunts, and we always save the antlers. Besides just setting them out on shelves, you can also repurpose them into other things, like jewelry holders or curtain tie backs. These two on the right we actually found in the woods behind our house. (Deer shed their antlers every year so that bigger ones can grow.) And speaking of deer…

blog - dec on budget 045

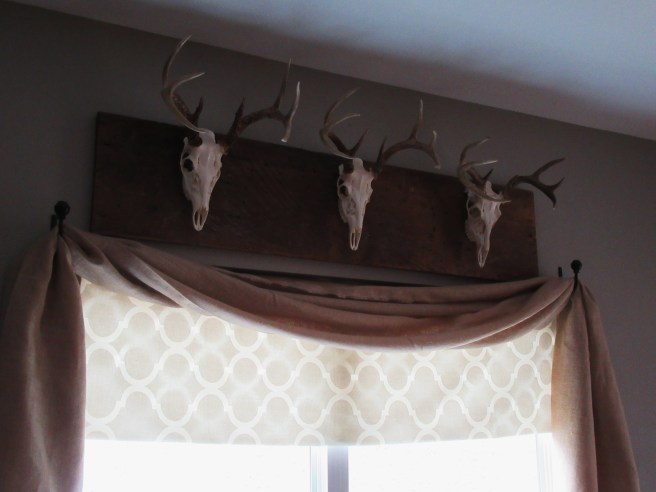
This is a really unique piece you won’t find in a store. This is our window behind our breakfast table, and we needed something to go above it to break up the boring space between the window and the ceiling. We had all of these deer skulls saved from our hunts (the one in the middle is mine!), and my husband actually came up with the idea of mounting them all on the same piece of distressed wood. We got the barnwood for free from a local salvage company (it was too short for them to use), and just so we didn’t mess it up, we got our taxidermist to mount them on the board for us. He was so pleased with how it turned out, he told us he was going to do the same thing at his house!


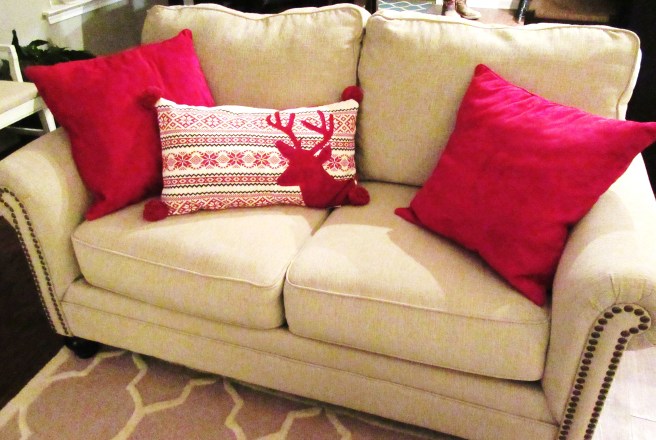
A great way to add color is to use throw pillows. They are cheap, and easier to change out than furniture when you get tired of a certain color. Pick a neutral color couch or chair, and any accent color you choose will always match. The chair on the right did not always look this cute. In fact, it was hideous. I found it at my local junk store, sitting in the corner, waiting to be rescued. It was brown, very scratched up, and the seat was burgundy and hunter green with several rips. (I apologize for not having a “before” picture of it, but trust me, you’re not missing much!) Even though this chair had seen better days, I took it home, mainly because it was only $10. I unscrewed the cushion and recovered it with a curtain ($12 at Walmart – same thickness as upholstery fabric but much cheaper) and staple gun, painted the wood this cream color, and added a $5 throw pillow I found on clearance. Now this pitiful chair looks like a $100 piece of furniture!

blog - dec on budget 039

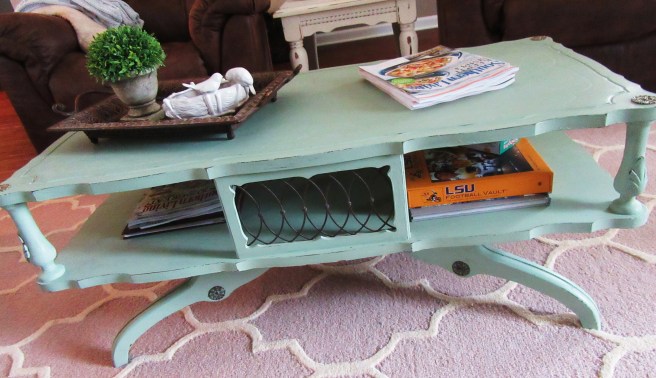
My absolute favorite thing in my living room, though, is THIS…COFFEE…TABLE. Isn’t it beautiful?!? Well, it’s ok if you don’t agree with me. My husband hates it! But since his hunting and fishing decorations are everywhere throughout our house, I get to also have some “girlie” things. This is an old coffee table I found at – you guessed it – a junk store. (I told you we have a ton of them around here!) It’s solid wood, and that is iron inlaid in the middle. It is sturdy enough for my 7-year-old son to climb on it, extremely unique in its shape and details, and was already distressed and painted this seafoam green when I found it! And the best part? It was only $30!

Accent tables are also a good way to add charm, and some unique and inexpensive ones can be found at garage sales, junk/thrift stores, and online. (This cute little chalkboard sign was handmade by my friend Danielle, who is very talented and makes a variety of inspirational signs. You can visit her shop at imperfectdust.etsy.com., and follow her on instagram @IMPERFECTDUST.)

blog - dec on budget 068

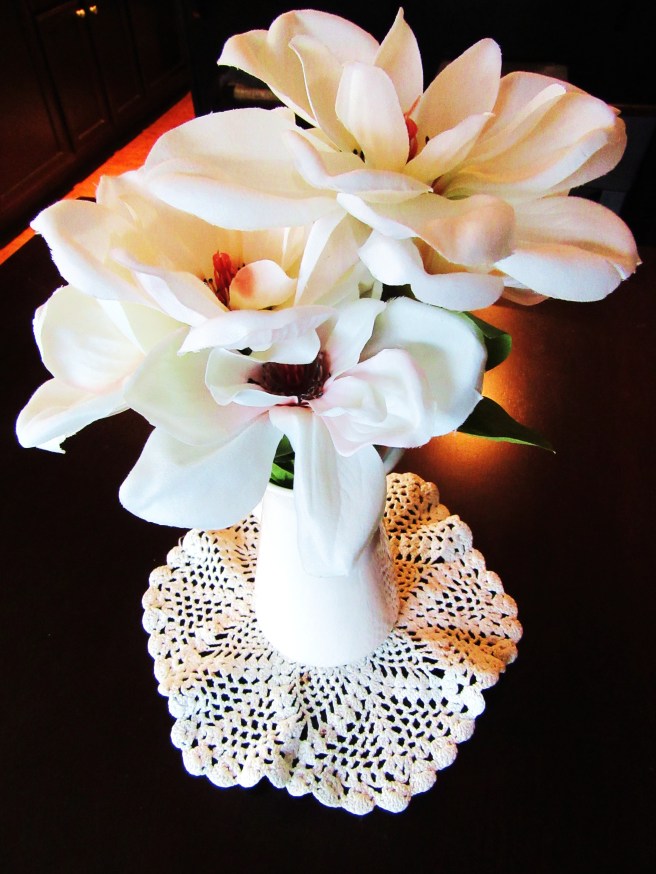
One of my favorite things in my house is this little doily on my kitchen table. It may be small, and it may have more than one stain on it, but it is very special. This was made by my husband’s great-great-grandmother, and it is still in our family. Using family heirlooms to decorate is a great way to remember family members who are no longer with us, and to pass on stories about their lives to your children.

Now let’s move on to the bedroom…

blog - dec on budget 021

I looked for months for the perfect headboard, and could not find one I liked that I could afford. I looked on Pinterest at some DIY headboards, but the materials needed for them were pricey as well. Then one day, while browsing through Hobby Lobby, I found this on the clearance aisle…

blog - dec on budget 025

Who needs a headboard when you can find a cool distressed metal wall-hanging for only $25?!? Not only is it unique and beautiful, but it leaves plenty of wall to be seen, making the space seem a little bigger. (Bedding from Pottery Barn and monogrammed pillow from Ballard Designs.)

When it came to a rug big enough to fit under a king bed, the prices were outrageous, so I found this remnant carpet piece at Lowe’s for less than $80. The trunk was $30 at Target, and is a good place to store picture albums and blankets.

blog - dec on budget 026

Since the master bathroom is visible from our bedroom, I kept the same neutral and blue shades in here. This chair at my vanity is one of my favorite finds! The fabric is the same color blue as in my bedding, and the chair legs are the same espresso finish of my cabinets, so it looks like it was custom made for this room. I found it at T.J. Maxx (can you tell I go to T.J. Maxx alot?!?) and it was not expensive at all.

A cheap way to add charm to your bathroom is to get some really cute handsoap – you can find these pretty soaps at most discount stores for under $5, and they can make your bathroom vanity go from plain and boring to fancy and colorful.

blog - dec on budget 069


And while we are on the subject of bathrooms, let’s go upstairs to the kids’ bathroom…

blog - dec on budget 049

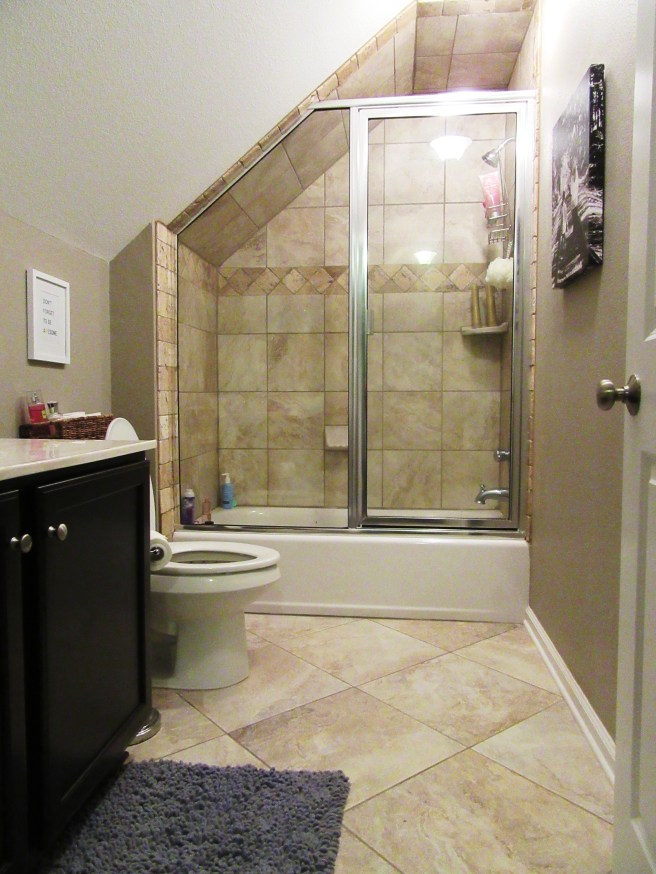
This is a very small bathroom, so I kept it simple in here. Luckily, we have a linen closet in the hall just outside of this room, because there’s not much storage in here.

I saw this “DON’T FORGET TO BE AWESOME” sign online and wanted it for their bathroom, but it was about $40 – waaaaaay too much! So I typed it on my computer in the same font/colors, printed it on regular paper and framed it – exact same sign for FREE!

The halls of a house often get ignored, but halls are a great place to hang pictures, make a gallery wall, or display a pretty runner.

Our hall upstairs also happened to be wide enough to squeeze in a small desk for the kids, leaving more space in their bedrooms.

blog - dec on budget 052

And speaking of kids’ bedrooms…

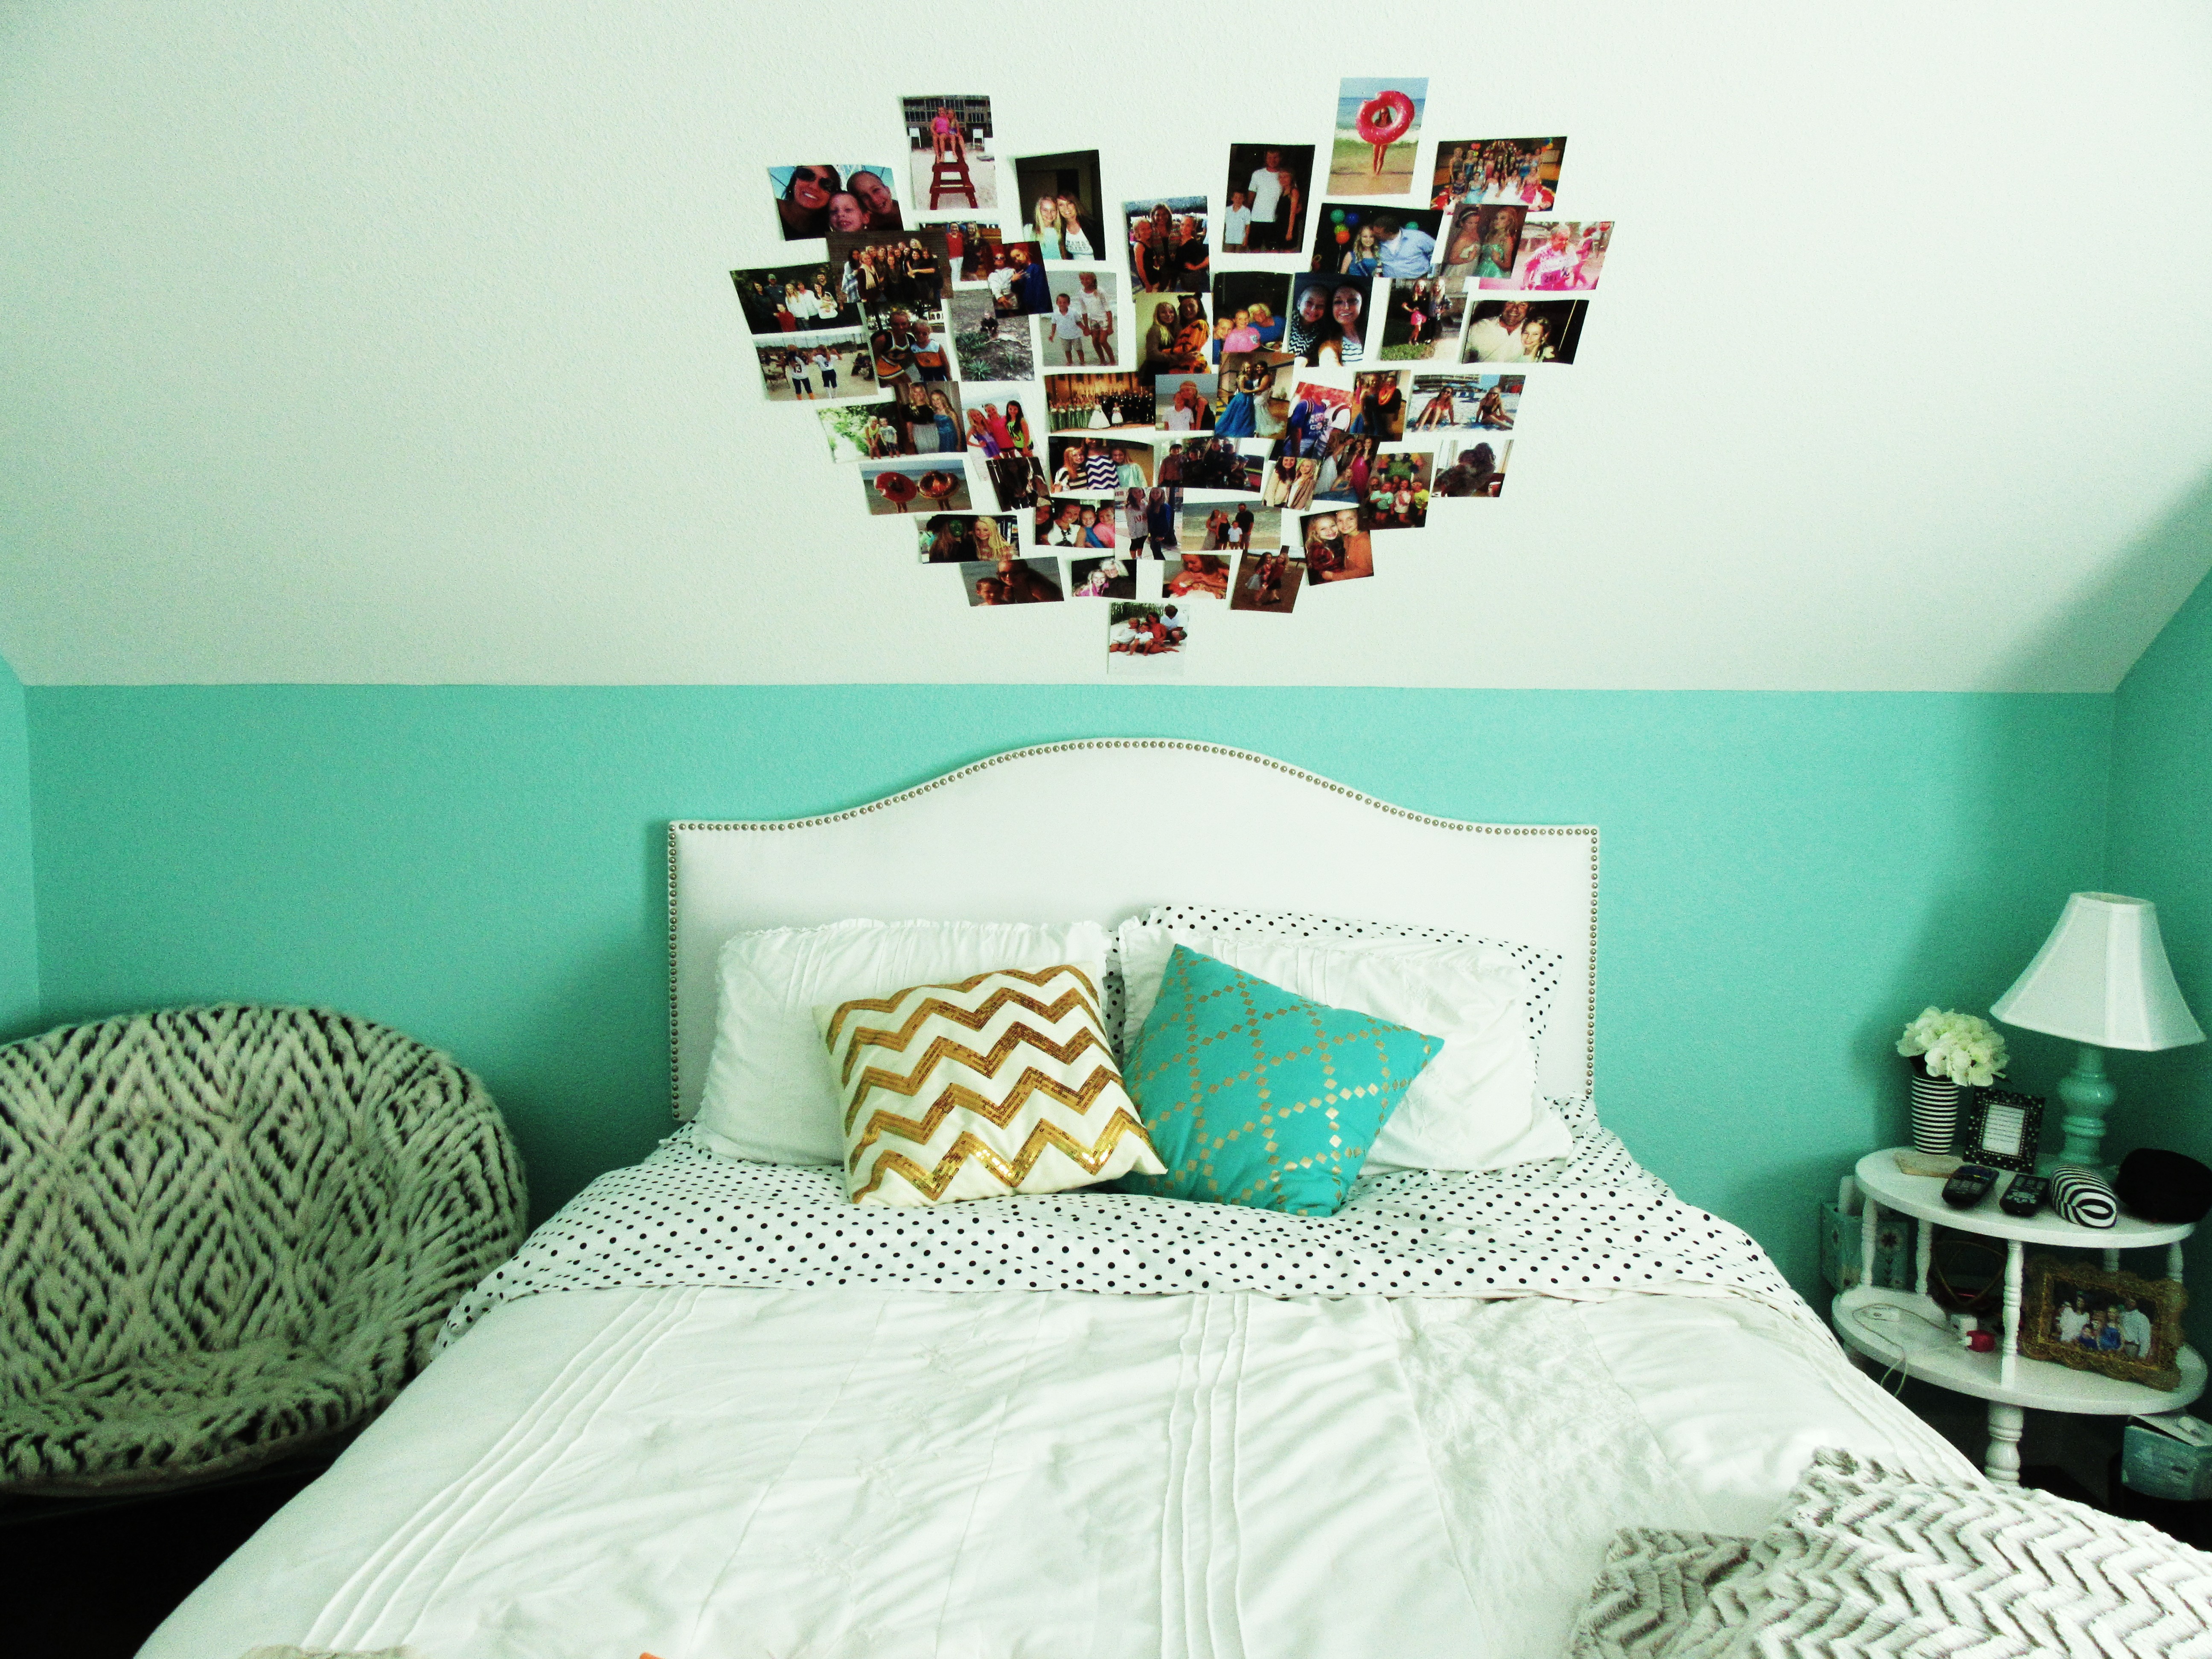
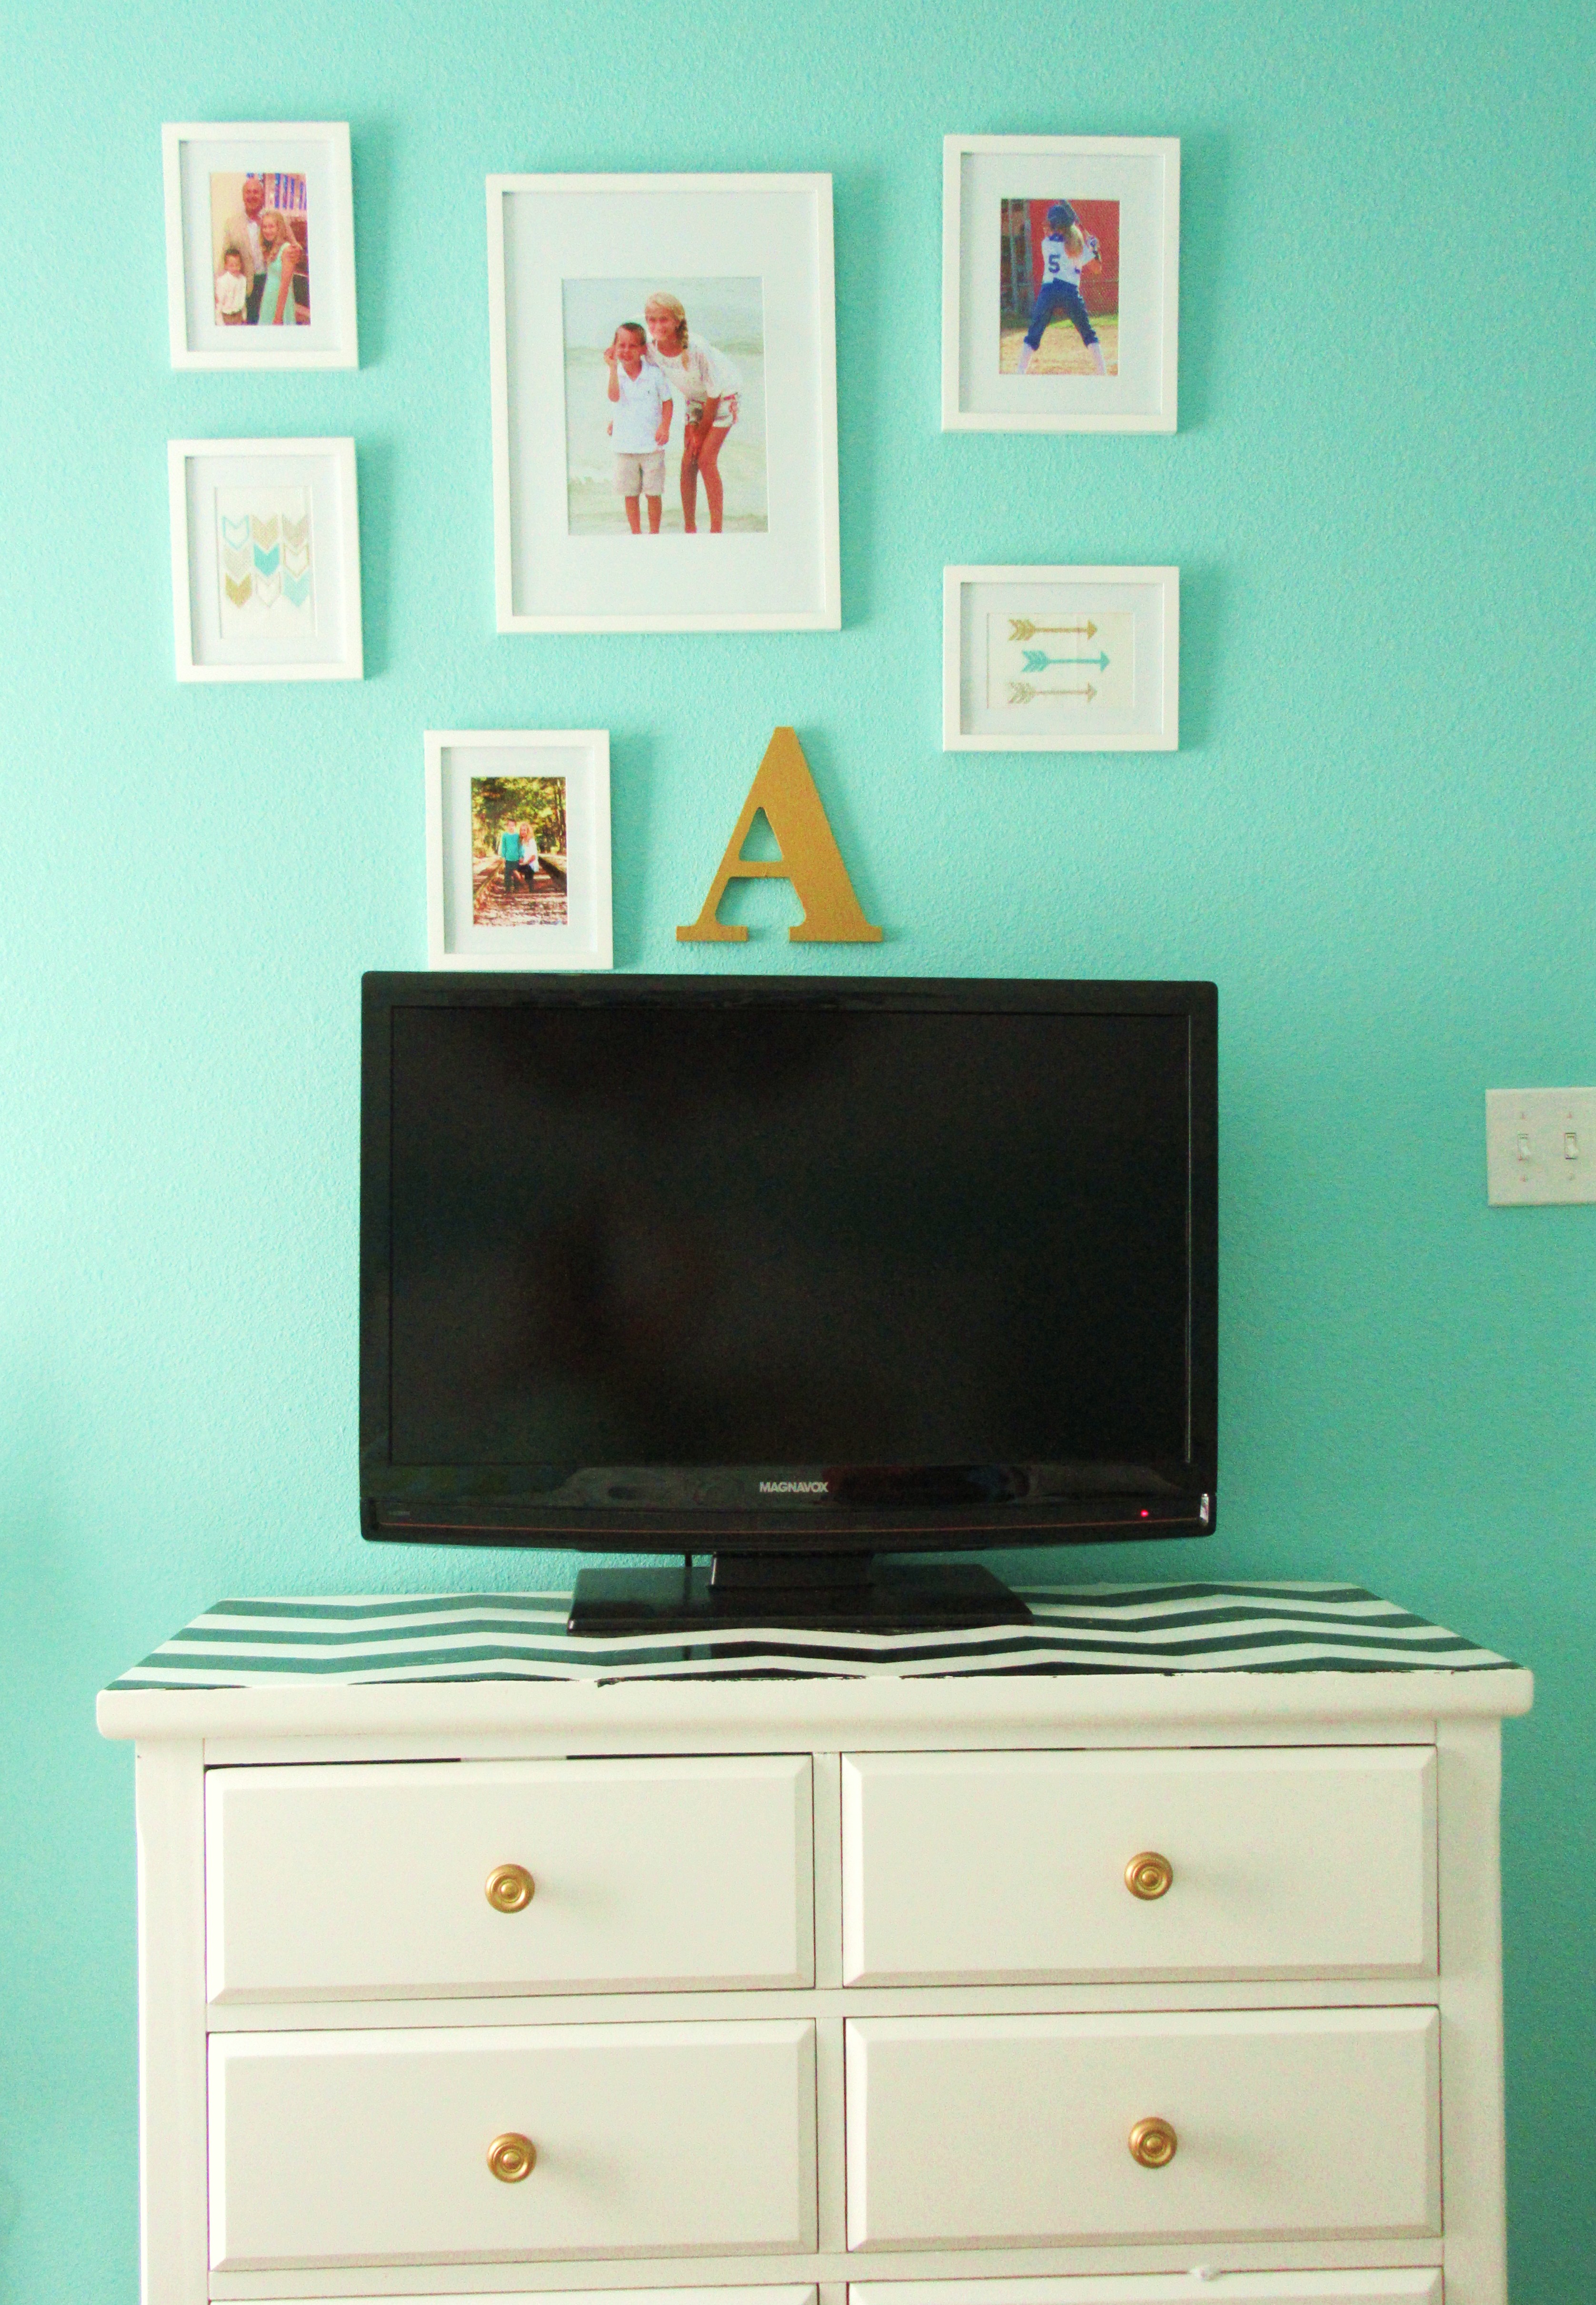
This is my son Cash’s baseball-themed room, and here is my daughter Allyson’s room…

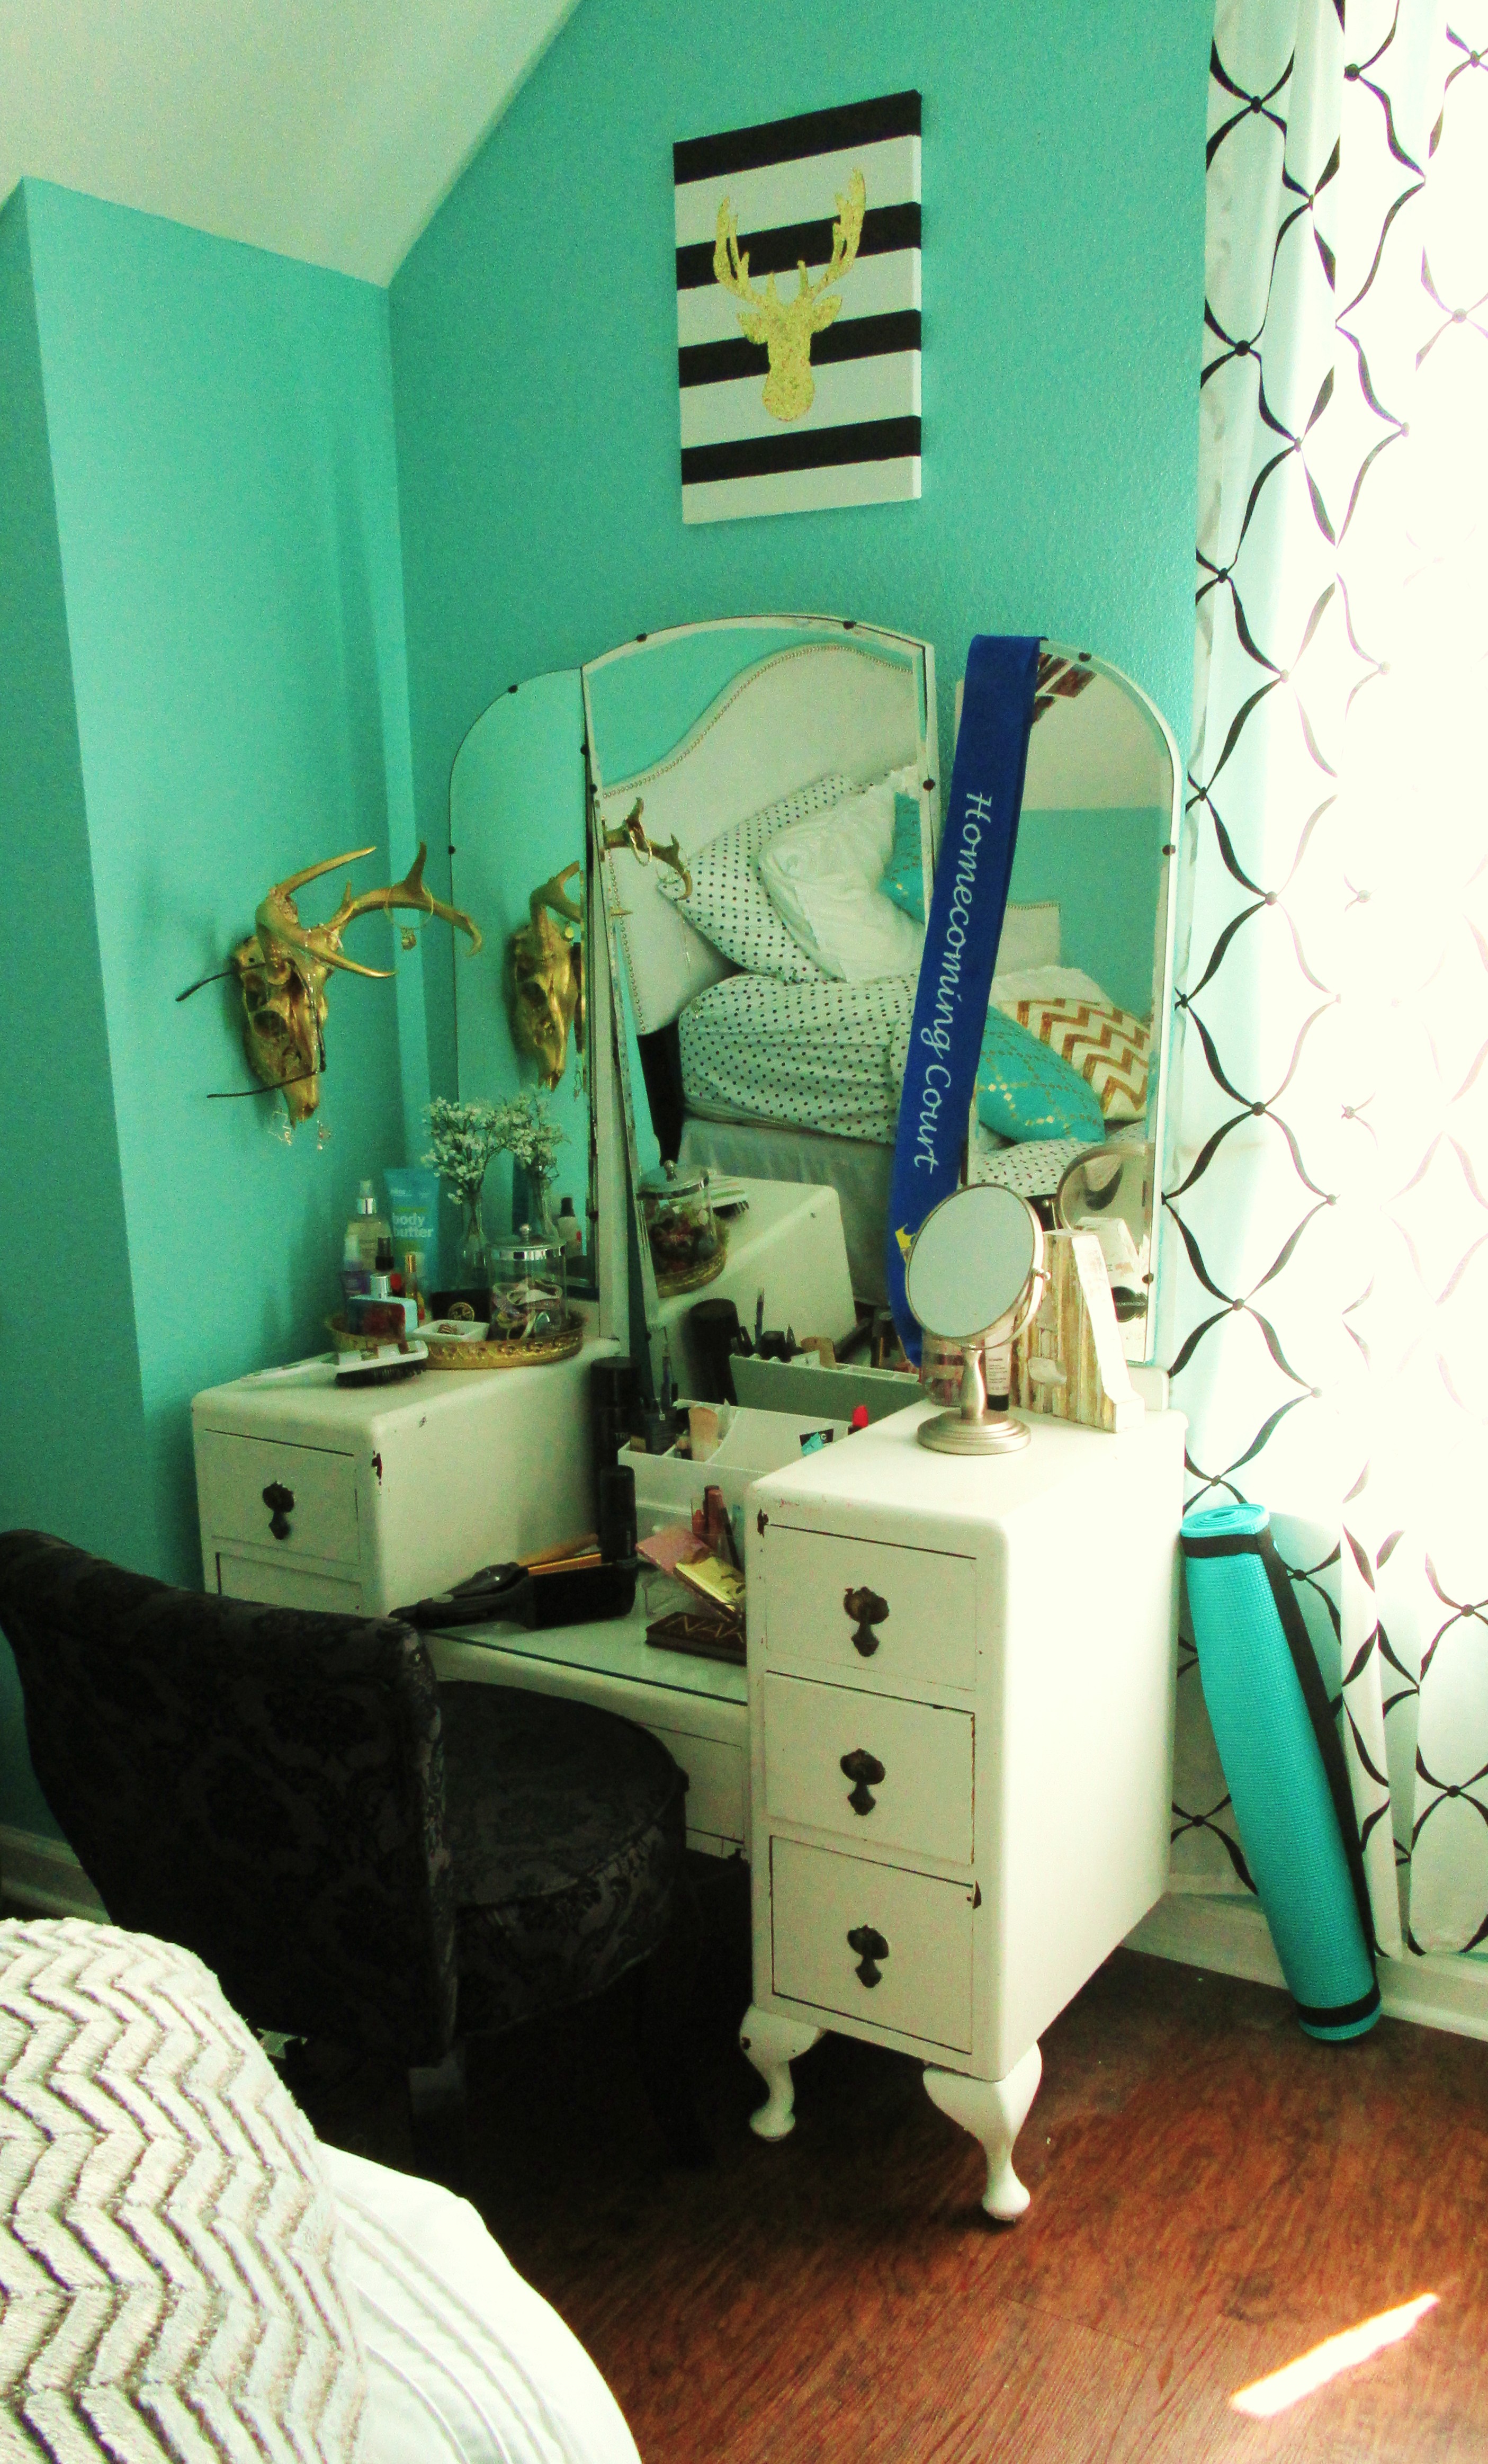
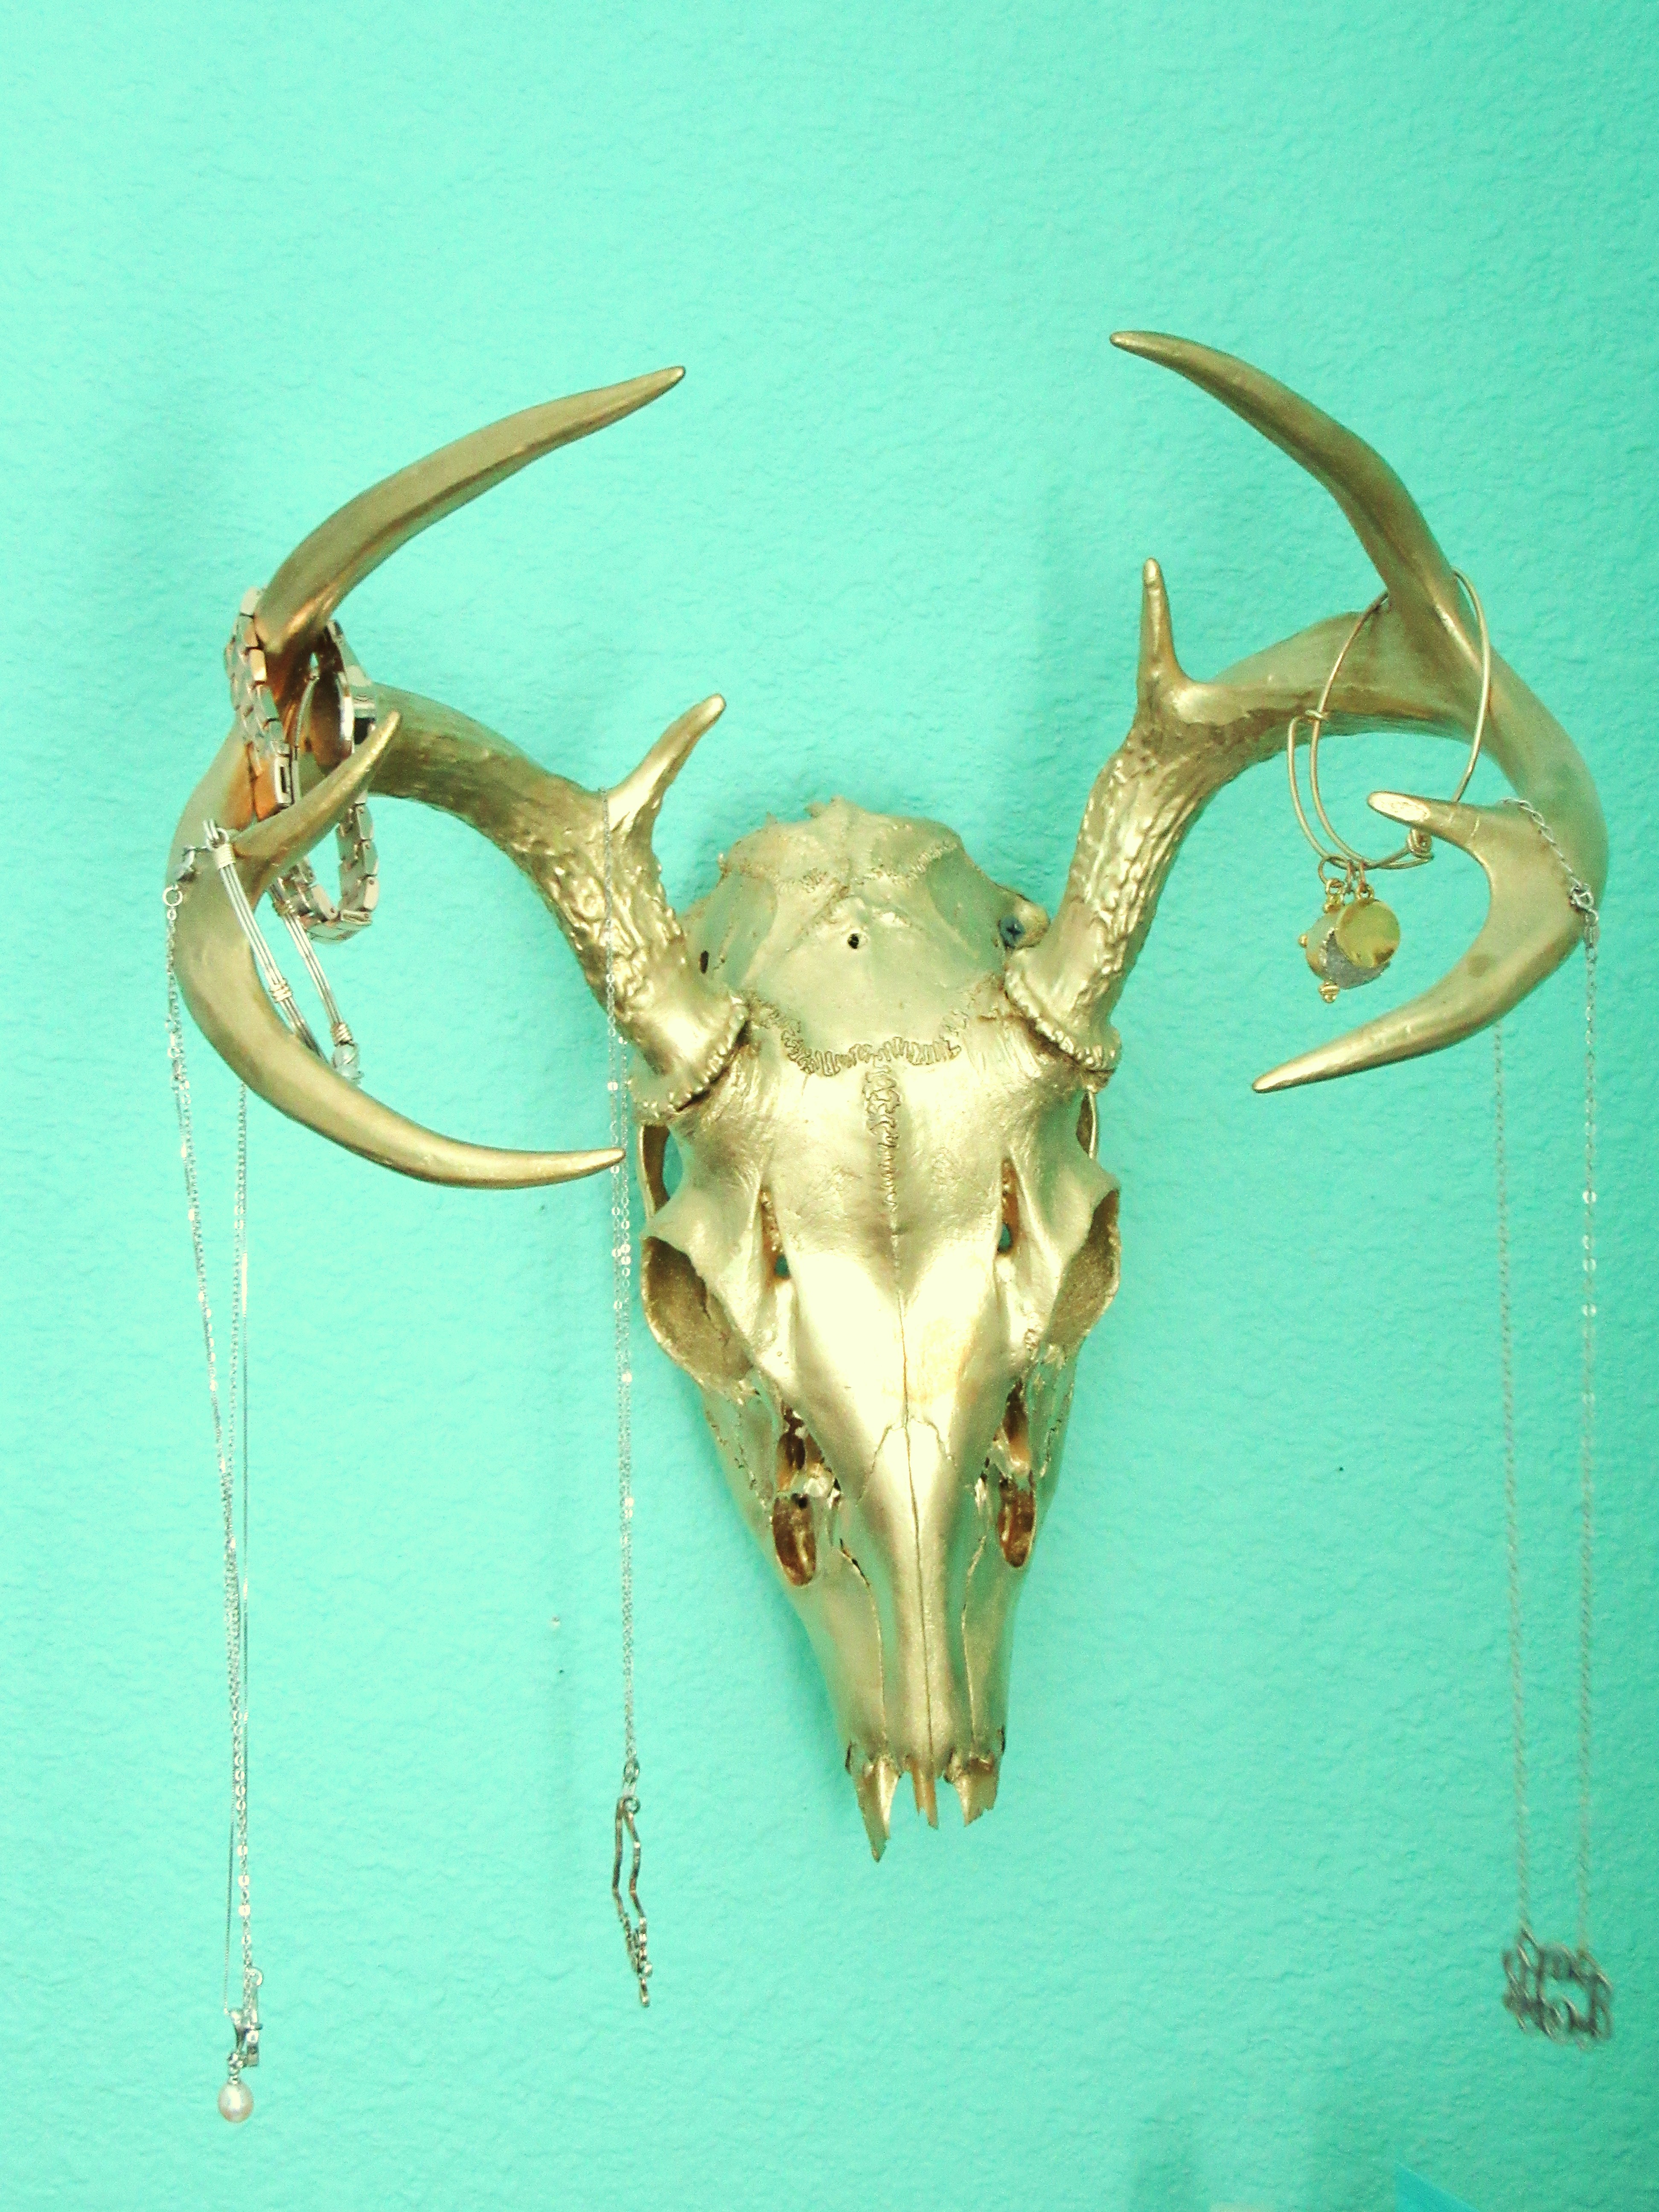
You can read more about how I decorated her room on one of my previous blog posts, “Allyson’s Room.” On the wall next to her vanity you will see a deer skull spraypainted gold and repurposed into a jewelry holder – very unique and cute!

The last room in my house I want to share with you is a room usually forgotten in the decorating process – the laundry room. But with as much time as we ladies spend in there, why wouldn’t we want it to be cheery and inviting?

These pictures of my children (even though they are from years ago) are hanging on actual pants hangers that I simply spraypainted turquoise – cheap, easy, and fitting for a laundry room. The letters that spell “WASH” are cardboard letters from Hobby Lobby ($1 each) painted with craft paint ($1 for 1 bottle). Rather than spend alot of money on cabinets above the washer and dryer, my husband rigged me up these old boards for shelves. I like them much better than cabinets because they open up the room and allow a spot to add some color.

So that’s the tour of my little home. I hope that I have inspired you to look around your house, your yard, your local junk stores (and even your local T.J. Maxx!) for some inexpensive ways to brighten up your space. My final advice is to ignore what is “trendy,” and just choose things that make you happy in your home, because you are the one who sees it everyday.

Thanks y’all!

– Nikki

blog - dec on budget 021


Creole Pulled Pork & Sausage Over Cheese Grits

pulledporkblog 018

Ok, this is it. The best recipe EVER. This is actually my husband’s new “death row meal,” meaning if he was on death row then this is what he would ask for as his last meal. (Previously it was chicken fried steak and mashed potatoes.) It’s that good.

Not only is it amazing, but it is also super easy. To begin, you need a 3-4 lb pork shoulder roast, dijon mustard, Tony’s seasoning and a crock pot.


pulledporkblog 007

Mix together about 3/4 cup dijon mustard and a tablespoon of Tony’s, then rub all over the pork roast and place in crock pot.

pulledporkblog 008

Fill just the bottom with water, about 1/2 cup. Do NOT cover the roast with water – you want the spiced mustard to form a crust when it cooks. Cook on low all day, at least 6 hours.

pulledporkblog 009

This is what it looks like after cooking. Yummy, right?!? But you’re not done yet.

pulledporkblog 010

About an hour before the roast is done, slice up some link sausage and brown in a skillet, then add to the roast. Continue cooking in crock pot for the last hour. (I used deer sausage.) And if you’re lazy like I am, you can skip the browning step and just throw it in cold. The browning will give the sausage some extra flavor though.

pulledporkblog 011

Using 2 forks, start shredding the pork roast. It will shred very easily.

pulledporkblog 012

After the entire roast is shredded, mix it with the sausage.

pulledporkblog 014

This is good enough to eat plain, but it’s even better over cheese grits. Here’s how to prepare them…

pulledporkblog 015

Prepare grits according to package directions, then add in desired amount of butter, shredded cheddar cheese and parmesan cheese. For 4 servings, I use about 2 tablespoons butter, 1/2 cup cheddar cheese and a sprinkle of parmesan cheese.


Now just pile the meat on top of the cheese grits, and serve. This looks and tastes like you worked all day on it, when the crock pot actually does all of the work. So easy, and so GOOD!

pulledporkblog 018

Thanks y’all!

– Nikki


10 Things I Can’t Live Without

We all have those little things we couldn’t make it through the day without, and here are my top ten…

10thingsblog 019

#10 – EOS lip balm – I am literally ADDICTED to this stuff! I have them stashed everywhere!

10thingsblog 020

#9 – Smashbox primer – As my younger-than-I-am husband loves to remind me, I am getting old, and this stuff is amazing at hiding it! It fills in fine lines and pores, and feels great on my skin.

10thingsblog 027

#8 – a good pair of tennis shoes – I am a nurse, so comfortable shoes are a must for walking all day.

10thingsblog 014

#7 – garlic dill pretzels – These are my favorite snack, and I start to panic when I am running low on them! To make them, toss 2 bags of pretzels in 1 cup canola oil mixed with garlic salt and dill weed, then spread evenly on cookie sheets and bake at 325 for 10 minutes. They are great dipped in hummus!

10thingsblog 025

#6 – my Keurig – I cannot function without coffee in the morning! (Another sign I’m getting old?) Since I’m the only one in the house who drinks coffee, this is perfect for making just one cup.

10thingsblog 021

#5 – Yeti cups – These are AMAZING! Totally worth the price! The small one keeps my coffee hot all morning, while the big one keeps ice in my lemon water all day. And that’s an accomplishment in Louisiana heat!

10thingsblog 017

#4 – this blanket – This is the softest, warmest, most fabulous blanket in the world. My husband got it for me a few Christmases ago, and I use it just about every evening.

10thingsblog 022

#3 – prescription sunglasses – These have been life-changing! I am practically blind when it comes to driving (again with the getting old!), so with these babies I can keep the sun out of my eyes while still being able to see where I’m going.

10thingsblog 024

#2 – my Bible – Next time you have a problem, big or small, try opening your Bible. I’m willing to bet there’s a verse on any page you open to that will help you. Mine has highlighted passages and notes written all in it, which I hope one day will inspire and comfort my kids when I’m not here.

calendar2014 072

#1 – my kids – Okay, technically they’re not THINGS, but they are still my #1 fave. They drive me crazy sometimes, and keep me super busy, but I don’t know what I would do without them. They are the best thing I’ve ever done, and I’m so proud to be their mom. (And my daughter is going to kill me for posting this picture! It was taken over three years ago, but it’s my favorite one of them, probably because they are actually getting along!)


Thanks y’all!

– Nikki


Hamrolls

014

These little babies are so addictive, and so easy to make! They only require three ingredients! My grandmother used to make these every year during the holidays, and they were my favorite part of Thanksgiving and Christmas dinner. Now that I’m a grownup, I can make them anytime I want, without having to wait an entire year to have them again! Anytime I have to bring something to a shower or a get-together, I get requests for these, which is perfect because they are super easy…

calendar2016 005

All you need are two 8-ounce packages of cream cheese, one package of sliced ham, and one bunch of green onions.

calendar2016 006

Start by cutting your green onions so that they are the same length as the ham slices.

calendar2016 007

Next, spread cream cheese generously onto a slice of the ham.

calendar2016 008

Place one of the green onions length-wise at the top of the piece of ham.

calendar2016 009

Starting with the green onion end, roll the ham up tightly.

calendar2016 010

Repeat these steps until you’ve used all the ingredients. Almost done!

calendar2016 011

Put them in the freezer for about 30 minutes so they don’t tear apart when you cut them, and then just slice them into little rolls!

014

You can make any substitutions you’d like, such as using turkey instead of ham, or using pimentoes instead of the green onions. I hope your family enjoys these as much as mine does!

Thanks y’all!

– Nikki


Decorating for Christmas

It’s my favorite time of year – CHRISTMAS!!! Family, food, Jesus’ birthday, gift-giving, and decorating! Christmas decorating can get expensive, so I thought I’d give y’all a few ideas that are on the cheaper side, but still unique…

blog5 001

Christmas card holders are in just about every store, but why not get creative with one? This is an old window shutter I found a few years ago at a junk store, and it just so happened to already be painted a lovely Christmas green color! AND it was distressed, giving it a nostalgic feel. The slats are perfect for sliding the cards into to display, and it was only $8 – much cheaper than a store-bought card holder.

blog5 006

Table centerpieces are another thing that can get pretty pricey, so I made this one myself. A friend had given me this cream and gold cake stand last year, and it made the perfect starting point for a centerpiece.

blog5 007

A cheap $2 candle, some pine cones, and some greenery from the dollar store, and now it’s a perfect centerpiece for the kitchen table. And even better, it’s not so tall that you can’t see the person sitting across from you at dinner!

The couch sometimes gets forgotten in the decorating process, but changing out the pillows to Christmas colors can really tie the room together.

blog5 009

Our usual pillows are turqouise and cream, but changing them to red makes a huge difference. This inexpensive change makes a huge difference in giving the whole house that holiday feel. I found these red velvet pillows at Bed Bath and Beyond, and the deer pillow at T.J. Maxx.

blog5 013

You can also accent pieces you already have, rather than bringing in new pieces for the holidays. This wooden lantern stays out year-round, but for the holidays I filled it with cheap Christmas bells from the dollar store.

blog5 014

You could also use small ornaments or candy canes, and vases or urns would work just as well.

blog5 015

I made this plate a couple of years ago with my son’s footprints. The plate came from Walmart and was only about $2. Some red and green Sharpie markers and green paint on his feet, and now we have a keepsake to display every year.

And speaking of keepsakes, here is an easy way to display all of your Christmas cards from years before – just punch a hole in the corner of the cards and tie with a Christmas ribbon.

You can keep these on the coffee table, and it’s fun to look back at them and see how everyone has changed over the years.

Christmas ornaments are another thing that can get expensive, but wrapping your tree with burlap ribbon (about $3 for one roll at Hobby Lobby) gives it a custom and rustic look, and then you don’t need quite as many ornaments to fill the tree.

blog5 002

Most of these ornaments are from the dollar store, but the burlap makes them stand out and look more expensive

And of course if you have kids, you get free hand-made ornaments!

blog5 018

Pine cones are another free decoration, especially if you live in Louisiana like I do! I gather some every year from the woods behind my house to use as filler.

blog5 003

I had these pre-lit miniature trees for the flower urns on my front porch, but they were too small. But add some pine cones around them, and…

blog5 022

…now they are the perfect size!

Small signs are another inexpensive way to pull your house together for the holidays. Most dollar stores have really cute ones these days. I got this one at World Market for my pantry door for only $6!

The Christmas decoration I am most proud of though is our family’s stockings. I cross stitched these for us, and my mother-in-law sewed them together for us.

blog5 005

They are beautiful, and something special that will be in our family each year.

So when it comes to decorating for the holidays, don’t panic! Look around your house for things you can use, and hit your local dollar store for some cheap ideas. And save your money for gift-giving instead! But most importantly, remember the real reason for the season, the birth of Jesus Christ.

Thanks y’all!

  • Nikki


Fruit Pizza

blog 4 023
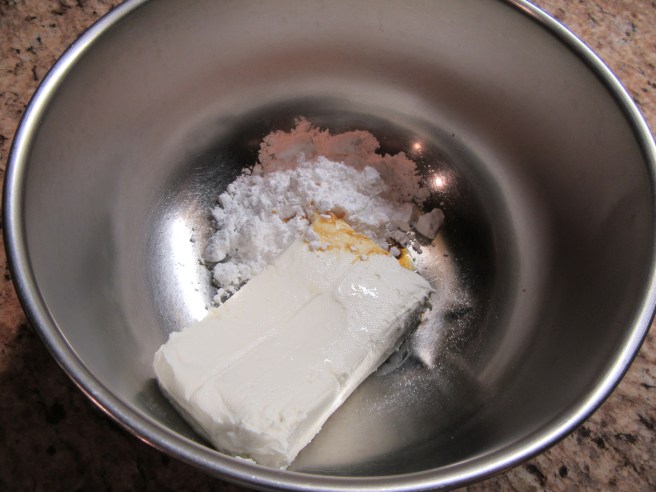
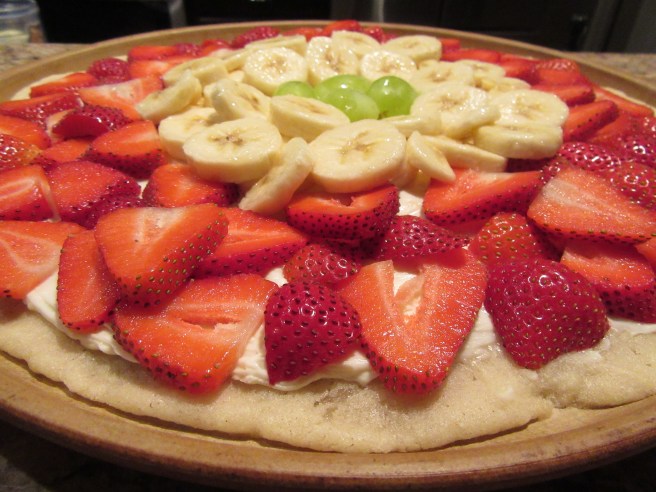
This is my kids’ absolute favorite dessert! (Hey, it’s healthy if it has fruit on it, right?!?) This “pizza” is so easy to make – here is what you will need: sugar cookie dough, cream cheese, powdered sugar, vanilla extract, and fruit.

blog 4 014

I took the easy route this time and used a pre-made roll of dough, but you can also use the mix that comes in a bag, or even go all out and make your own dough from scratch.

blog 4 015
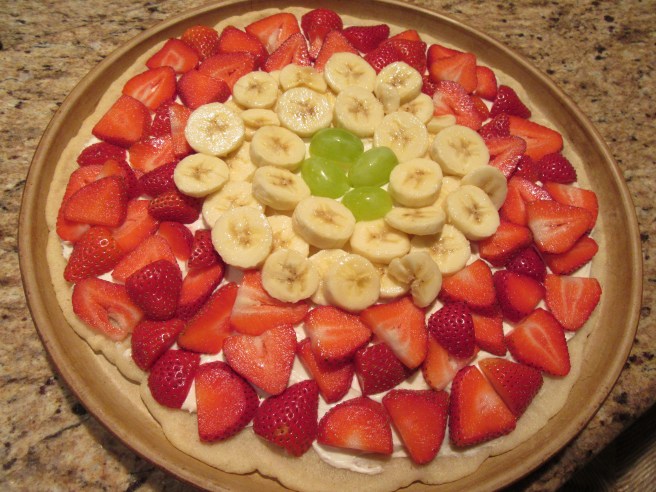
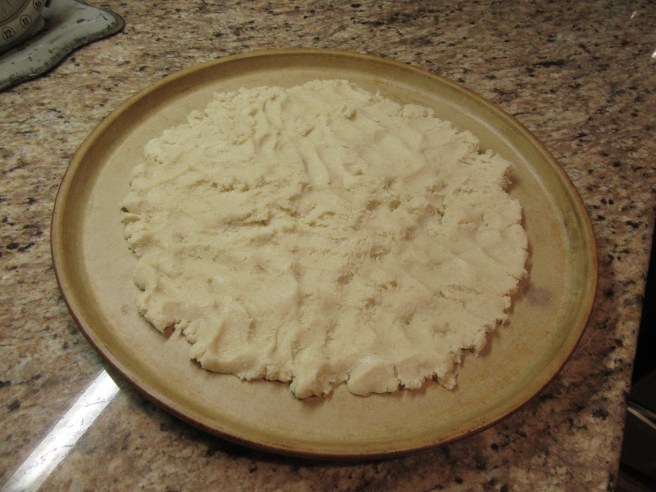
Using your hands, spread the dough out on a cookie sheet evenly, making one giant cookie. I use the stone kind because it cooks more evenly and does not stick, but a metal one will work fine. Be sure to leave a little room around the edge since the dough will expand when it cooks.

blog 4 016
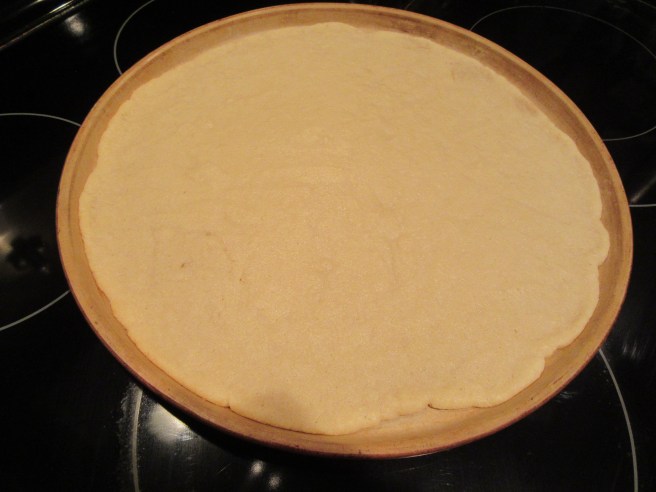
Bake at 350 degrees for 10-12 minutes. The cookie should still be soft. This will be the “pizza crust.” Allow to cool completely.

blog 4 017

Now it’s time to make the “pizza sauce.” You will need one 8-oz package of softened cream cheese, 2 heaping spoonfuls of powered sugar, and a teaspoon of vanilla extract.

blog 4 018

Mix together in a bowl until smooth.

blog 4 019

Once the cookie is completely cooled, spread evenly onto the cookie. If you don’t wait until it has cooled, the cookie will tear apart. (I learned this the hard way!)

blog 4 021

Now it’s time for the “pizza toppings!”

blog 4 020

I used bananas, strawberries and grapes for this one. You can use any fruit you want – sliced kiwi, blueberries, blackberries… Just slice them up and arrange on pizza.

blog 4 022

If you use bananas, be sure to squeeze a little lemon juice on them to prevent them from browning. Refrigerate for about an hour, then slice and serve!

blog 4 024

Cajun Chicken Pasta

blog3 021

This is one of my family’s favorite meals – my husband would eat it every night of the week if he could! I love it because it looks so fancy, so you can fool everyone into thinking you’ve been in the kitchen for hours! It’s called “cajun” chicken pasta because of the cajun spices, but you can add as much or as little as you’d like to fit your taste.

blog3 009

Here’s what you’ll need:

     1 pkg chicken breast tenderloins

     Tony’s cajun seasoning

     1/2 onion, chopped

     2-3 cloves garlic, minced

     1/2 jar sundried tomatoes packed in oil

     handful of fresh basil, chopped

     1 lb penne rigate pasta

     3/4 cup grated parmesan cheese

     small carton heavy cream

blog3 015

This is the MOST important ingredient! They are amazing! No one in my house likes tomatoes, but we love these! They taste very sweet so they balance out the spices, and add pretty color to the dish. They are in the grocery store with the canned tomatoes. Also, fresh basil looks and tastes the best, but you can use dried if you have to. I have some growing at home because I cook with it alot (and I love the smell!), but I have seen it in the produce section of the grocery store.

Start by boiling your pasta in a large pot. You can prepare everything else while it’s boiling, so that it’s ready to be added at the end.

blog3 011

Season the chicken with the Tony’s on both sides, as much or as little as you want. There’s no need for salt and pepper, because the cajun seasoning has everything already in it.

blog3 012

Next, cook your chicken in a large skillet in a little olive oil (or whatever oil you have) until it’s completely done, about 5-7 minutes per side depending on high your heat is.

blog3 013

While the chicken is cooking, go ahead and chop up your garlic and onion. If your jar of tomatoes do not come already cut up, you can chop these now also.

Remove the cooked chicken from skillet and set aside to cool a little bit, then add garlic and onions to same pan. Saute until tender. They will turn dark because of the drippings in pan from chicken.

blog3 014

While they are sauteing, cut up the cooked chicken into bite-sized pieces. When the garlic and onion are cooked enough, about 2-3 minutes, add the chicken pieces back in, along with the sundried tomatoes.

blog3 016

Cook just another minute or two, then stir in the heavy cream.

blog3 017

Stir in the parmesan cheese next to make the sauce for the pasta. The sauce will actually turn kind of orange because of the tomatoes, but don’t be nervous – it’s good!

blog3 018

After the cheese is melted, stir the boiled and drained pasta into the sauce and top with the basil. Your family will be so impressed!

blog3 020

This takes me about 30-40 minutes total to make, but it will look (and taste) like it took you hours! Serve it with some garlic bread and a salad for beautiful meal.

Thanks y’all!

  • Nikki

Allyson’s Room

blog2 006

I get asked all the time what my daughter’s bedroom paint color is called, as well as where I found some of the decorations in her room. So, I decided to make my second blog post about my 13-year old daughter’s room.

When we were deciding on a paint color, we wanted a unique color, but also one that would “grow” with her. The one we chose is Sherwin Williams “aquaduct,” and we couldn’t be more in love with it!

When we first built our house the accent colors in this bedroom were hot pink and white, which also looked very cute against the aqua. The teenage years, however, call for something a little more “sophisticated,” so we transitioned to black, white and gold accents.

blog2 005

The original pink and white curtains were swapped out for these black and white quatrefoil panels, purchased from amazon.com. I scored this elegant black vanity chair from my local T.J.Maxx store, and the vanity itself was given to Allyson by her aunt. We took her small pink accents, such as picture frames, and spray painted them gold. Here is something else we spray painted gold –

blog2 004

We wanted a unique way to hang jewelry close to her vanity table, so we started looking around outside for inspiration. We originally thought a tree branch would be cool, but then we saw this deer skull and knew this was it! Hunting is big part of our culture here in Louisiana, so there was no shortage of deer antlers to choose from. We spray painted the entire skull with a shiny gold color, then drilled a small hole in the back to secure to the wall with a screw. The antlers are perfect for hanging necklaces, bracelets, headbands, etc.

blog2 003

We even spray painted the drawer knobs on this dresser gold to match. One can of $4 gold spray paint went a long way!

blog2 002

Now I have to talk about this chair! Don’t you just want to curl up in it right now?!? And yes – it IS as soft and comfy as it looks! There were originally small white bookcases in this corner of the room, but Allyson thought they looked too cluttered, and also really wanted somewhere to sit besides the bed. After searching online and in local stores, we found this one from Pottery Barn Teen, and we knew it was the one! Of course it was the most expensive one we found, but since we hadn’t spent much on updating the rest of the room, we decided to splurge on it.

blog2 001

The pictures in the shape of a heart were Allyson’s idea from something she saw on Pinterest. We originally put them up with sticky-tack, but they kept falling since that part of the wall is slanted. I didn’t want to use thumbtacks because of all the holes they would leave in the wall, so I ended up using straight pins, like the ones in the sewing section of stores. They are too tiny to leave a noticeable hole, and also aren’t visible on the pictures.

The nightstand in the corner was originally painted pink, and we just painted it white to match everything else. The black and white polka dot sheets are Cynthia Rowley, found at T.J.Maxx, the cheetah rug in front of the bed is from Ballard Designs, the accent pillows both came from Hobby Lobby, and the white fabric headboard with nailhead trim came from amazon.com.

I hope she is satisfied with the black, white and gold accent colors for a LONG time! But when she does get ready for a change, I’m thinking navy and coral would look pretty with the aqua wall color.

Thanks y’all!

  • Nikki

Mason Jar Salads

I’m sure you’ve all seen these mason jar salads on Pinterest, but have you ever actually made them? Well, I’ve been making them almost every week for the past couple of years, and they couldn’t be easier! Not only do they taste amazing, but they are super easy to prep. I make them on Sundays, and then I have a convenient and healthy lunch ready for the whole week!

blog 015

The key to making these salads taste fresh all week long is to keep the salad dressing and lettuce from touching each other. No one likes a soggy salad!

blog 012

First you will need some mason jars – I use the big ones because I like a big salad! Put your dressing in first – I found that a ladle is the easiest method. I use ranch made from the Hidden Valley packets, but you can use any dressing you’d like. I also use fat free sour cream instead of mayonnaise to make my ranch healthier, and I add a little dill weed for more flavor.

Next, drop in your vegetables, cheese, etc. In these I used frozen peas, purple onion, cucumbers from my garden, boiled egg and shredded cheese. It’s okay for the veggies to sink into the dressing – they will not get soggy like the lettuce will.

blog 013

blog 014

All that’s left to do now is fill the rest of the jar full of lettuce and put the lid on. Now how easy was that?!?

blog 015

Now you have a healthy and tasty lunch for the rest of the week! Just grab one out of the fridge at lunch and dump onto a plate! They taste fresh all week long, and they are so much better for you than fast food!

You can change up your dressing or ingredients each week for some variety, or even do pasta salads instead.

The only thing you can’t put in is croutons, as they will get soggy, so I keep a bag around to add to the salad after I dump it out of the jar.

I hope you enjoyed my first post! You can follow my blog for future posts on recipes, DIY projects, kids’ stuff, home decor, fashion, and more!

Thanks y’all!

  • Nikki